From Bootable to Usable: A Guide to Restoring Your USB Drive for Everyday Use
Introduction
After turning a USB stick into a bootable USB drive, you may find it unusable for normal purposes, such as transferring data. I initially believed that simply deleting all the files on the USB stick would return it to its regular functionality. After searching online for a guide to revert the USB stick, I couldn’t find a satisfactory solution (perhaps my research skills weren’t up to par). Therefore, I took it upon myself to create a comprehensive guide. In this blog post, I’ll demonstrate how to “revive” your USB stick, whether you’re using Linux or Windows.
Linux Method
To use the USB stick as a normal storage device again, you’ll need to format it, which will erase all existing data. On Linux we can use GParted for the formatting.
1. Start by launching gparted (if not installed, you can install it with sudo apt install gparted):
sudo gparted
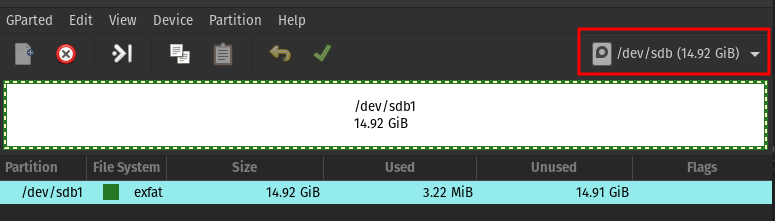
This will bring GParted interface, you can use the dropdown menu in the top-right corner to switch between your different drives. The USB drive will often be named /dev/sdb, or a similar identifier. You can also identify your storage device by the space in GiB.
2. Delete the existing partitions listed on the USB drive
Right-click on each existing partition listed on the USB drive and select “Delete.” Confirm any prompts. I only have one partition listed for me as /dev/sdb1. If the “Delete” option is greyed out it means that you have to unmount the device first. Go to your file explorer right-click on your device and select “Unmount”.
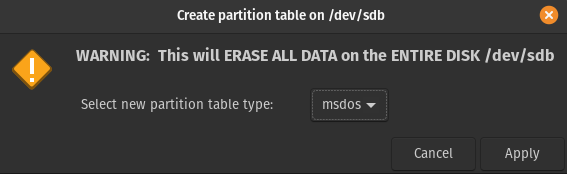
3. Create a New Partition Table
After deleting all partitions, click on the “Device” menu and select “Create Partition Table.” Then choose the type of partition table you want to create (usually “msdos” for MBR or “gpt” for GPT) and click “Apply.” (msdos will work just fine)
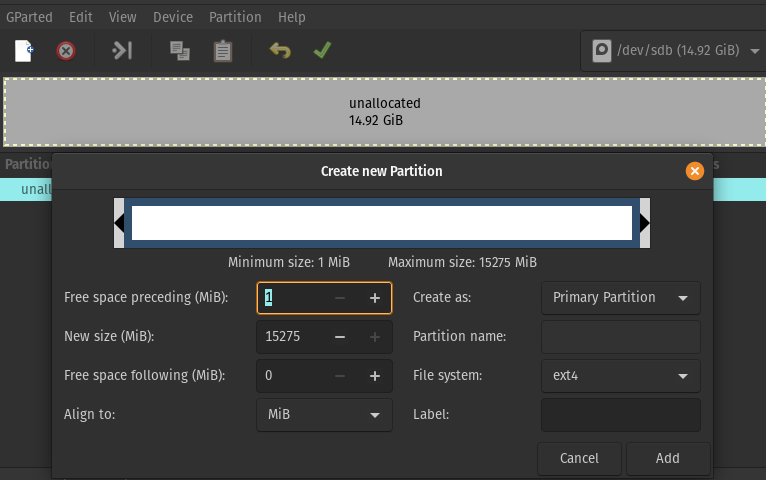
4. Create a New Partition
Now, create a new partition on the unallocated space. Right-click on the unallocated space, choose “New,” set the desired file system, and click “Add.” Click on the green check button to “Apply All Operations”. You have to use the green check button everytime you see “1 operation pending” at the bottom of the screen.
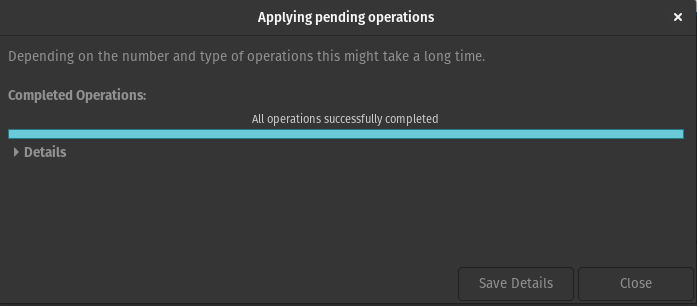
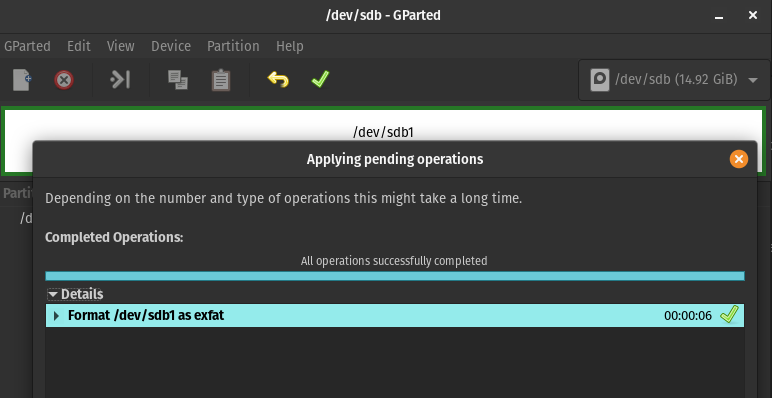
5. Formatting successful
You should see a screen saying that All Operations were successful. But there is more that you can do.
6. File system configuration
In my case I have two laptops (Windows and Linux) and in order for storage devices to work on both systems you have to use a compatible file system type. I recommend to format your device to exFAT if you want to use it on Windows and Linux. If you plan on using it exclusively on Linux system choose ext4 and for Windows systems NTFS.
Righ-click on the partition and hover over Format to, you will get a list of file systems, select exfat and press the green check button to continue. Close all the window after the operations are done and you should see that under the File System section the device now uses exfat.

Your USB device is now ready for use.
7. Device not showing in file explorer on Windows systems
It may happen that despite the USB stick being recognized on a Windows system, it does not appear in the file explorer with other drives such as (C:) and (D:). This happens because the device does not have a drive letter assigned. You can fix it by using the Disk Management application on Windows.
- Right-click on the Start menu and select “Disk Management” from the context menu.
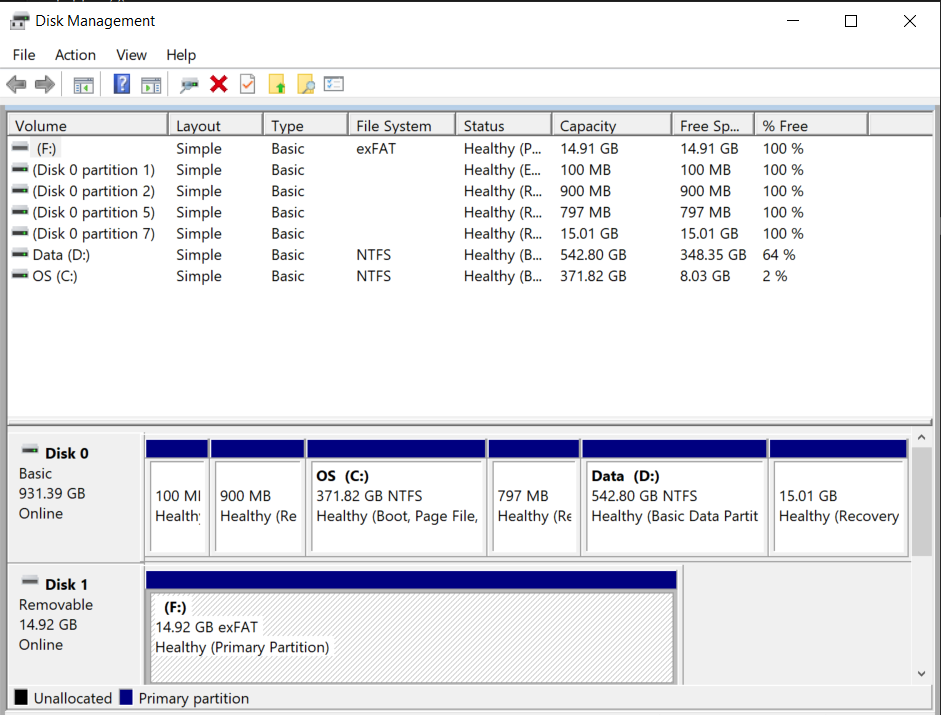
In the Disk Management window, you should see a list of drives. Look for your USB drive, which may be labeled as “Removable” or “Unknown.”
Right-click on the USB drive and select “Change Drive Letter and Paths.” and Click “Add.” (It is better to leave some free letters for the computer drives, so choose F: or something further than that).
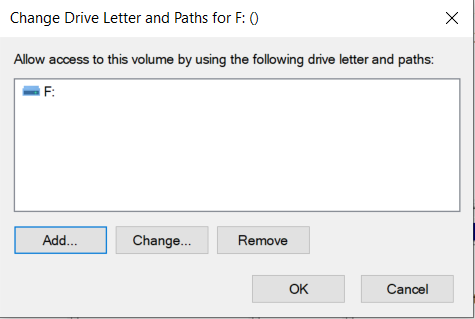
- Choose a drive letter from the list and click “OK.
After assigning a drive letter, your USB drive should now appear in File Explorer on your Windows computer.

Windows Method
Plug the bootable USB drive into a USB port on your Windows computer.
Press Win + E to open File Explorer.
Right-click on the USB drive and select “Format…” from the context menu.
In the Format dialog box, you can choose the desired file system. For compatibility between Windows and other operating systems like Linux, you can choose exFAT. If you only plan to use the USB drive with Windows, you can choose NTFS. You can also set a volume label if desired.
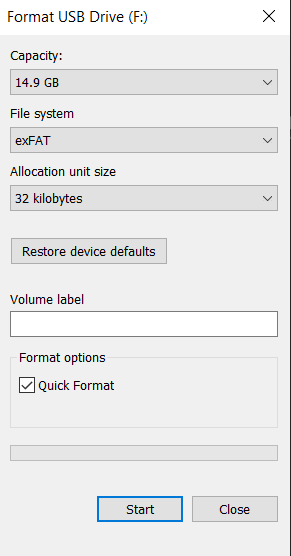
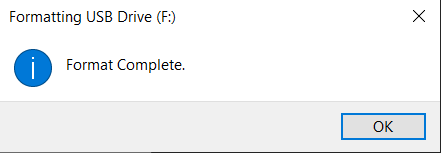
Click on the “Start” button to begin the formatting process.
If prompted to confirm, click “OK” to proceed. Note that formatting will erase all data on the USB drive, so make sure to back up any important files before proceeding.
Wait for Windows to complete the formatting process. This may take a few moments, depending on the size of the USB drive.
- Once the formatting process is complete, safely eject the USB drive from your computer to ensure that all changes are finalized and the drive is safe to remove.
After completing these steps, your bootable USB drive should be reverted back to a normal USB stick, and you can use it for regular storage purposes.